My original plan for this week actually failed because I didn’t organize well enough to get the necessary materials for it. So I had to pivot and figure out something else. Luckily, there is a thing that is on my list of ideas and it just happened I needed to learn a little about it for my job. The thing I’m talking about is obviously the thing from the title – 3D modeling. I have a little experience with 3D modeling, but it’s from more of an architectural standpoint. And by that I don’t mean I did anything connected with architecture, I mean straight lines, simple shapes, and parametric modeling in Google SketchUp and Fusion 360. But what I needed for work is something with a feature set more compliant with natural, irregular shapes. My mentor showed me how he would do my task in Cinema 4D but in the end, I chose Blender for the most obvious reason of all – it’s free. And it’s also a very feature-rich program far beyond my current capabilities and the requirements of my task.
I tried to do what I usually do when learning a new program, watch a couple of basics tutorials and then try to make something on my own but Blender turned out to have a steeper learning curve than I expected. The thing with Blender is that there is a looot of options and they aren’t really accessible unless you know where to look for them or if you know the shortcuts. And there is a lot of shortcuts. The one I would single out is ctrl+S (the shortcut for saving the project), you’ll see why in a minute.
With my first try not going anywhere, I did something that never fails, I found a tutorial! Luckily, I found a really great and comprehensive tutorial series on YouTube. It’s very well thought out and it takes you through most of the things you need to really get started. After going through it, I think I can make some basic stuff on my own.
In this tutorial series, we are making a doughnut, and as I’ve understood, that is something like “Hello world” for people learning Blender. As I’ve said, the tutorials are really good so I didn’t have much trouble just following the instructions and getting the desired results. Except when my Blender decided to crash and I didn’t save the file. I turned it on again hoping there is an autosave but it didn’t work this time so I had to do a lot of the doughnut again. This time though it went a lot faster and it was probably a good way to reinforce what I’ve learned so far. After that, it was mostly smooth sailing, with endless small corrections and playing with settings. If I didn’t have a deadline, I would’ve still been here tweaking stuff.
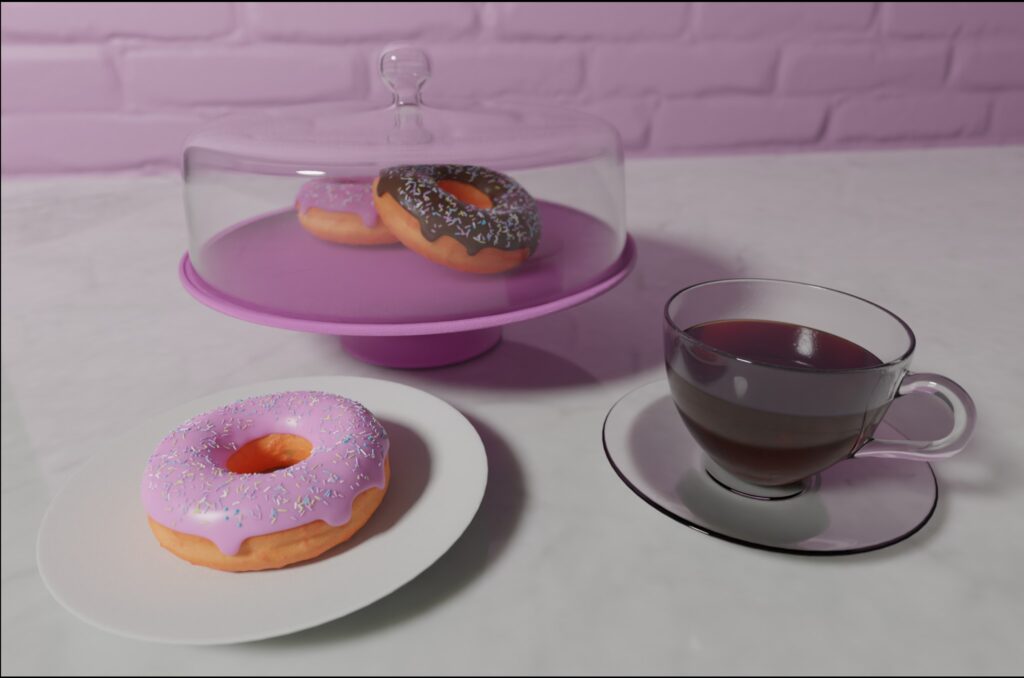
After following the tutorial, I felt it wouldn’t be satisfying to post just something I made following a tutorial so I had to make something on my own. That something ended up being the cake stand with a glass dome. I chose something with a simple enough shape but that fits into a scene and I’ve duplicated a doughnut a couple of times and put them on the stand.
I am fascinated with how realistic stuff you can make in Blender. Mine aren’t quite photorealistic, but they do look really decent. I will for sure continue playing around with this because it’s really fun and the possibilities are endless. I didn’t even touch animation, rigging, some more serious sculpting, and stuff like that.
Boring stuff
There is not much I can really say in this section since I mostly just followed a tutorial, so here it is again:
And also, here is a gallery with some steps along the way since I would occasionally render an image so you can see the progress through the stages.


