My friends and I are playing Warhammer Fantasy Roleplay for several months now (Warhammer Wednesdays as we call them). This is a role-playing game similar to Dungeons & Dragons. Even though we’ve been playing it for so long, it was just a couple of weeks ago that I realized I own a 3D printer and I can print miniatures for our small party of adventurers. I already knew about Hero Forge, an awesome website where you can customize your character model as much as you could wish, but the problem is that if you want to download 3D files, you need to pay a not insignificant amount of money. And the point of this project was for us to get fun minis without paying anything. Luckily, I found out about Desktop Hero 3D, a similar website. Although it is less feature-rich and you have less customization, it had one crucial advantage over Hero Forge. Downloading STL’s (3D files needed for 3D printing) was free! As long as you don’t want items or pieces of clothing that are premium. As I’ve said, it doesn’t have a lot of options, but it was enough for us to make miniatures that represent our characters well enough.
At first, I didn’t think this would be a good project for this blog because it’s partly about 3D printing which I’ve already done, but our DM wisely pointed out to me, this is more about painting the figures. And while I’m on this topic, this wouldn’t have been possible without our awesome DM who is also basically a professional miniatures painter since he’s been doing it for years. He provided the paints, tools, and most importantly his knowledge. He gave us a crash course and helped us to not mess up too much.
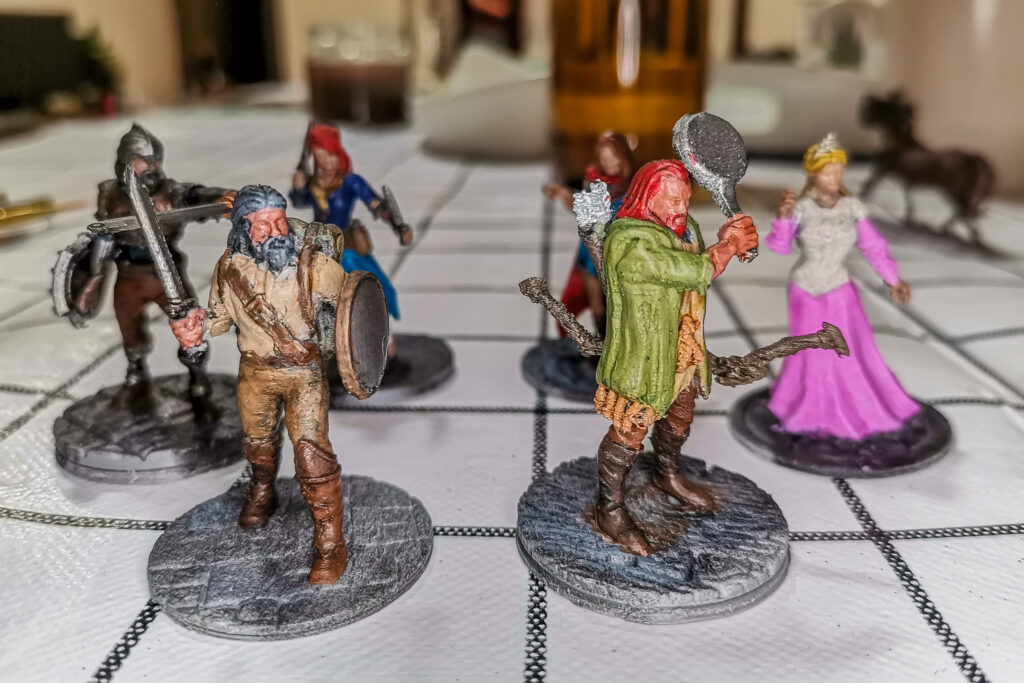
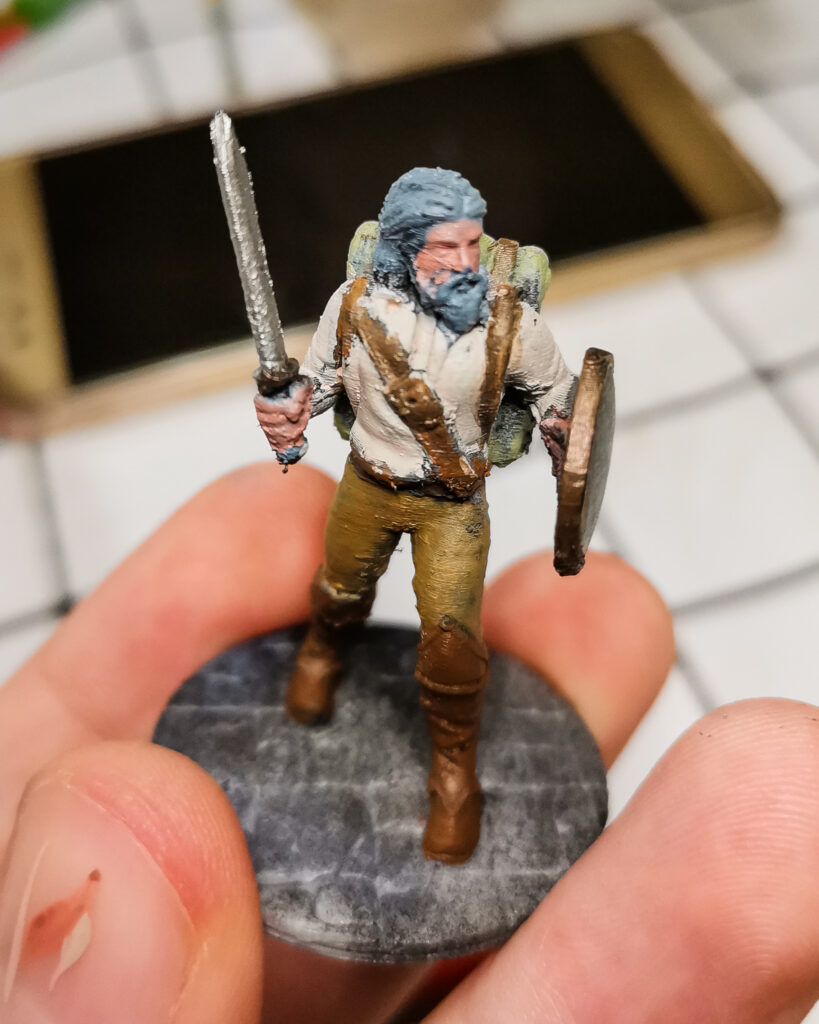
As it can be seen in the photos, this isn’t completely done. We didn’t have enough time to finish in one session so we will continue next time and I will update this post with new photos. According to our mentor, we are just at 30-40% done so hopefully they will look a lot better. Although I am very satisfied with how they look even at this stage. And they certainly look better than if I did this on my own.
Painting the minis was the most relaxing part of this project. It is very meditative. And while you can lose your eyes looking at tiny details, it feels nice to be careful and precise with your brush strokes. This is definitely a project I was the most excited about in the last couple of months (excluding Arc de Triomphe, obviously) and I can’t wait to finish it in the next session. It is also the first project I’m not doing alone and it’s really fun doing stuff like this with friends.
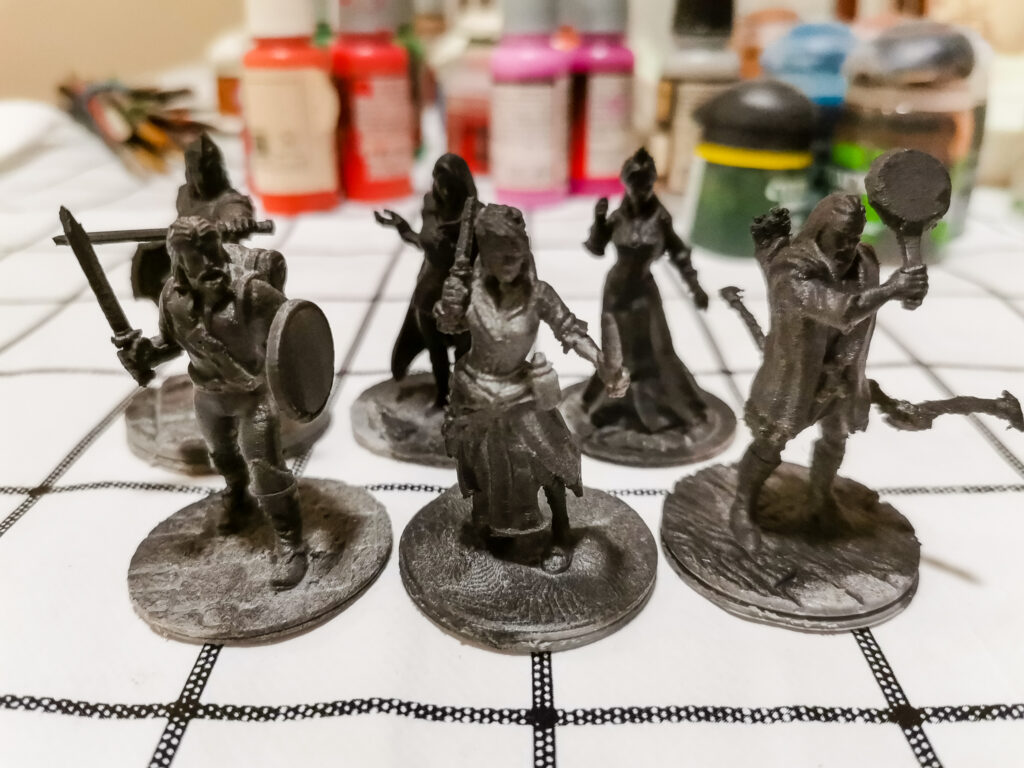
In this post I’ve shown mostly the images of my character since that is the one I’ve been working on, but here is the gallery of the rest of the gang. Meet the Rope Crew (there is a funny story behind the name): L’Ord di Nature, Clementine Violette, Thomas Dupre, Amélie Arquette, Mignon Lauper and Francois de Francois.
")


Boring stuff
I will divide this into three sections, modeling, printing, and painting.
Modeling
Desktop Hero is really straightforward app. On the left, you have your character, and on the right, you have lists of body parts, clothing, and items from which you can choose.
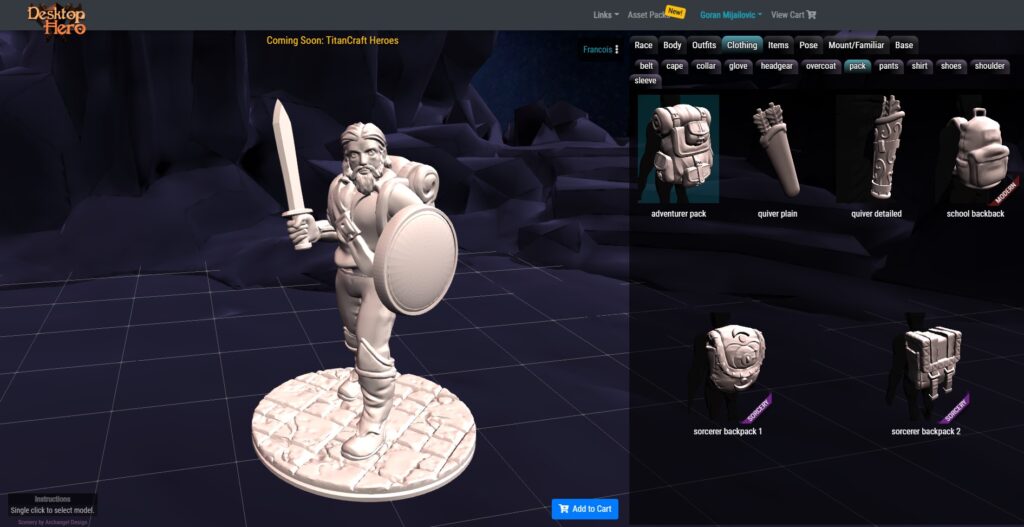
You can also choose one of the predefined poses. But, if you’re not satisfied with them, you can show the bones of the model and move them and rotate individually. This proved to be very useful because not every pose is easy to print so I had to edit some of them.
Printing
Printing proved to be the hardest part. At first, I told everybody to finish their models a couple of days before the session so I have time to print them all. Boy, was I wrong. In the end, I didn’t have a single print ready for that session. I had a lot of trouble dialing up the settings. And the worst part was that they would usually fail in the last third of the printing. Which for a 9-hour print means that it would fail after 6 hours. The fails were usually missing arms or items they were holding in the arms. In the end, I dialed in the settings and the prints lasted for 5-7 hours and they were ready just in time for the next session.
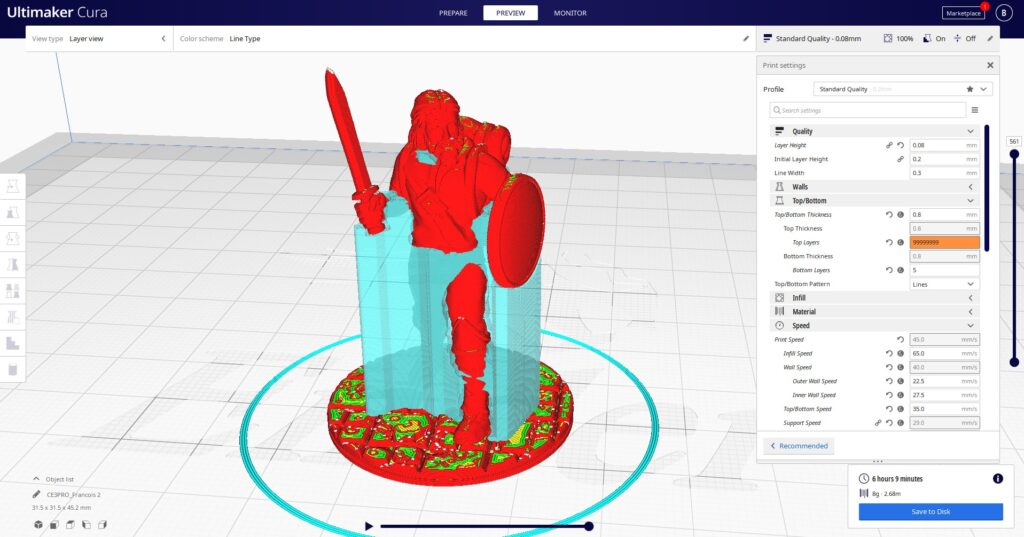
I gradually made prints with smaller and smaller layer height (which is also good for details) and slower and slower. I also changed the printer nozzle from 0.4mm diameter to 0.3mm diameter and increased the size of the minis from 35mm tall to 45mm. A crucial thing was also the supports. Even though I really wanted to use tree supports, they were more prone to failure and were impossible for some of the characters. In the end, I printed only one character with tree supports and it came out almost perfect. Unfortunately, standard supports, while they did their job well, had another unfortunate effect. Since they were really hard to remove, all the characters except one had their legs broken off along with the supports. Luckily that is nothing that a little bit of glue can’t fix.
I have to point out that FDM printing isn’t the best for this particular use case. Resin prints would be much better detail-wise, and also the layers would be less visible. Unfortunately, I don’t have a resin printer so these will do. And with a layer height of 0.8mm, the level of details is surprisingly good.
Painting
This is a part where I will avoid talking too much since I don’t know that much and it feels silly to give instructions for something where I was just following instructions from someone who actually knows what they’re doing. I will shortly describe what we’ve done.
We started with a little bit of theory where we found out how the painting works and why are things done like they are.
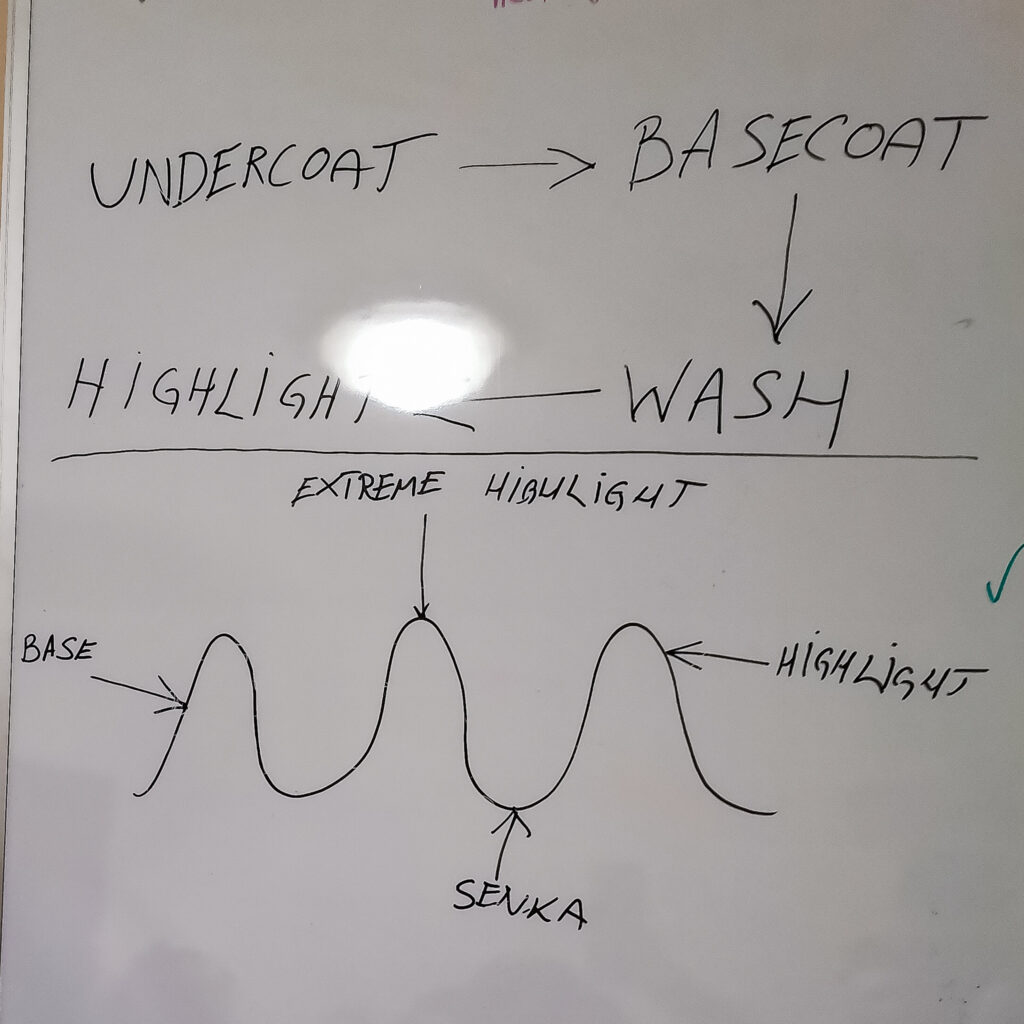
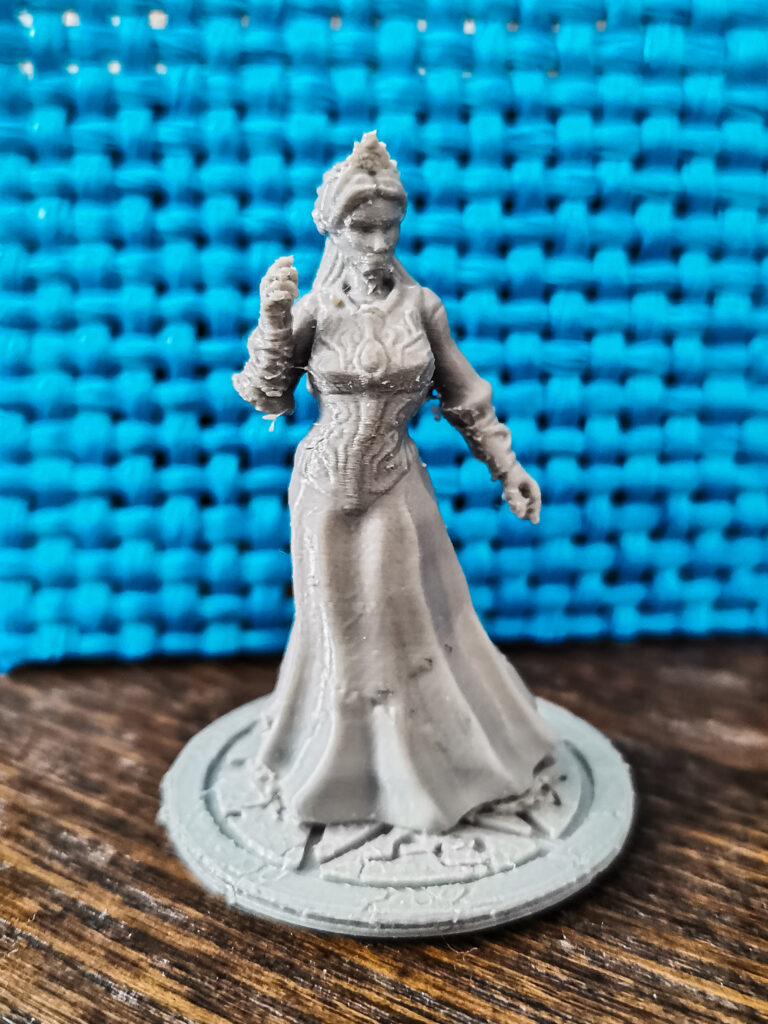
Our DM prepared the figures for us. He cut away the printing imperfections and primed them with black spray paint.
We started by dry brushing, mostly to get to know our minis and all the details they have.
After that, we painted the base coat. You can see this was done by someone who has never done this before. The paint job is sloppy, but in reality, it doesn’t look as bad as in the photo and you’ll never look at it from this distance.
Then comes the wash, which is magic as we’ve been assured, and it did not disappoint. It gives the figures much more depth and blends in different areas together.
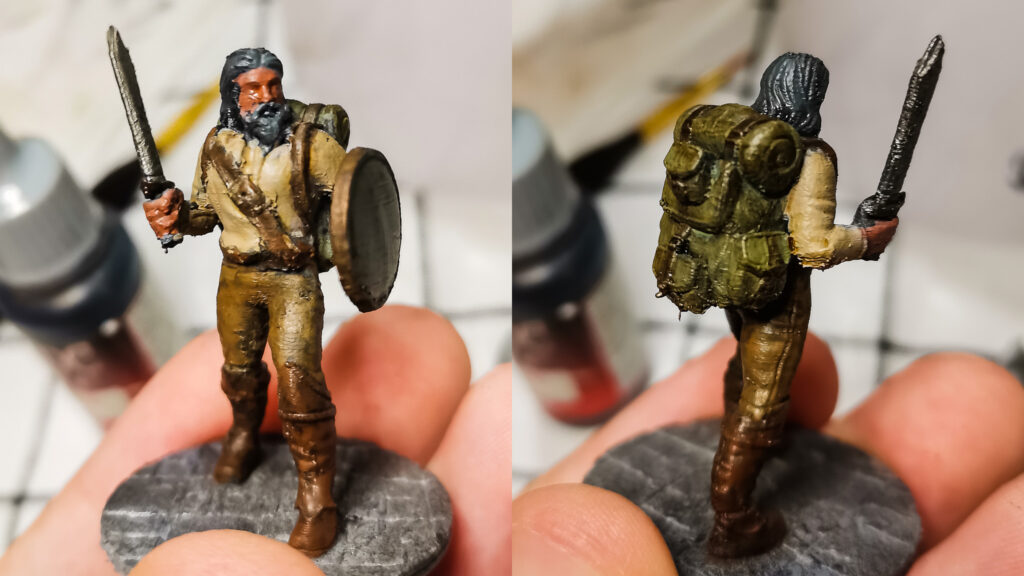
This is where we have run out of time in this session so we had to stop. After all of this, we’ve basically only done the shadow layer and next time we’ll do the base layer, highlights, and extreme highlights. And we obviously don’t have the details like eyes yet.