Leatherworking videos were always satisfying to watch for me, so naturally, I wanted to try leatherworking for myself. You need surprisingly little to try it out. If you want to do it seriously there are plenty of tools you can acquire, but for something basic, you could probably even do it with common household items. I did buy a couple of specific things on AliExpress, but the rest I had on hand or I borrowed.
The tools I’ve used are:
– Exacto knife
– Hole punch (for this specific case you could make a hole with an Exacto knife or anything else since it doesn’t have to be pretty because it won’t be visible)
– Punches for stitching holes (I bought these for cheap on AliExpress but I’ve seen a guy using a fork for this)
– Thread (I bought a nice waxed thread for leatherwork but it was too thick for my needles so I didn’t end up using it and instead used some sewing thread I had)
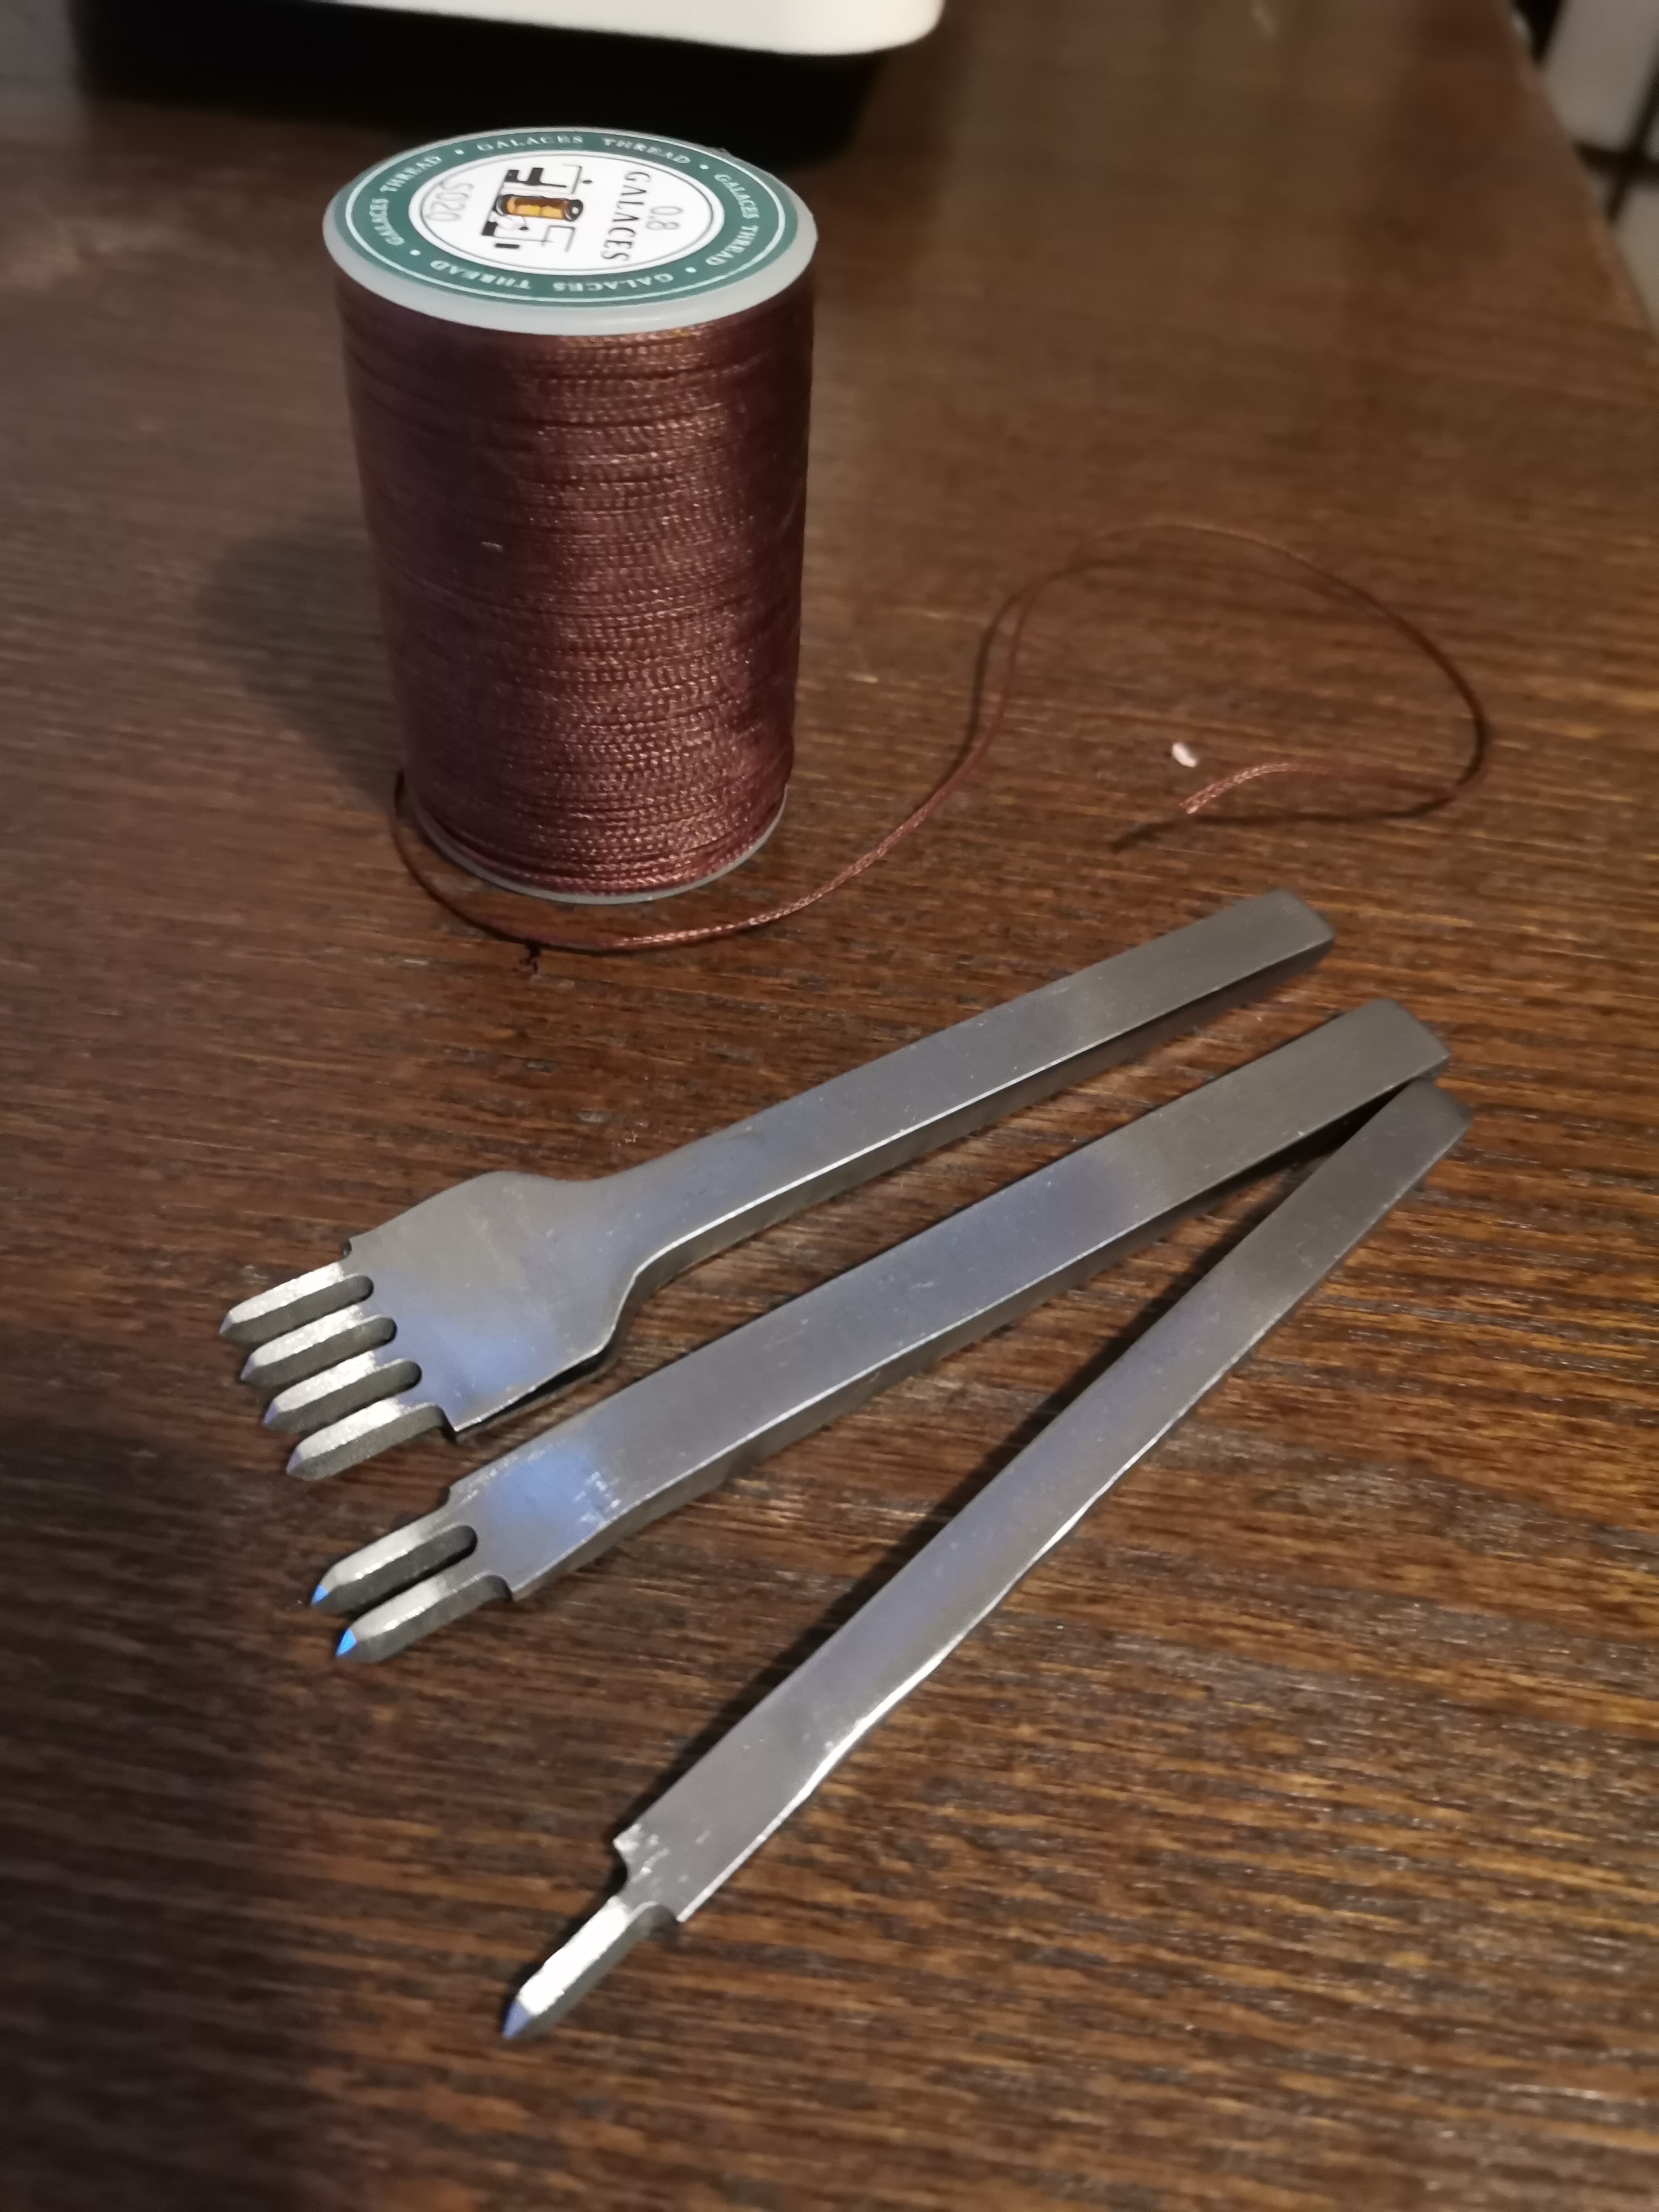
– Sewing needles (for the technique I’ve used you need two but there are techniques for one and if you’re using a thick thread you probably need a needle with a big eye)
– Glue (leather glue is recommended but I’ve used a random glue I had lying around and it seems fine so far)
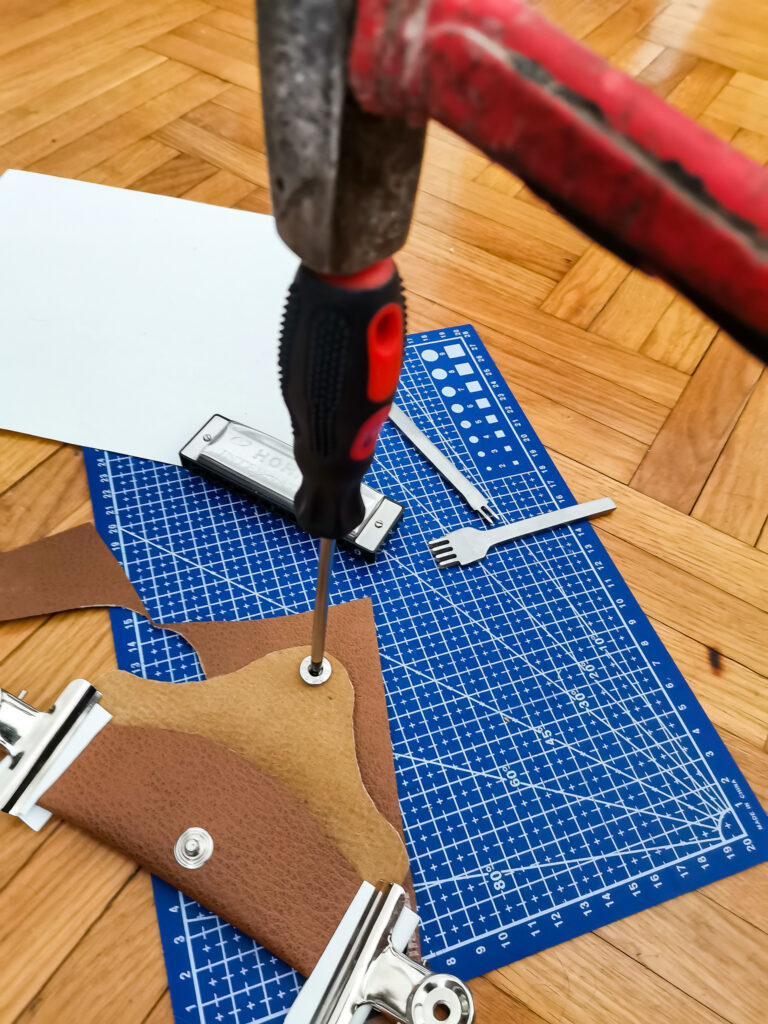
– Hammer and a screwdriver (Snap setter tool would be much preferred but I don’t have it so this had to do)
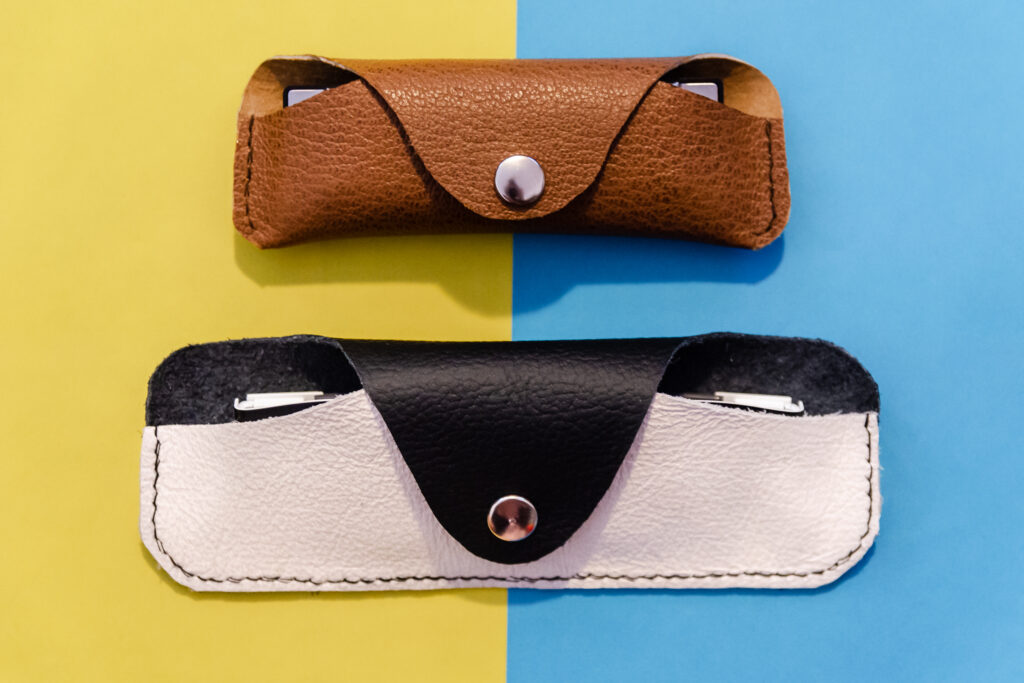
As I was thinking of what could I make, I was researching what would be some easy leather projects and I stumbled on one that would actually be useful. Since my girlfriend has blue light glasses but not a case for them, I thought it would be nice to make one for her. One of the conditions for choosing the project was also that it had to be small since there is a store nearby me that sells small leather scraps for really cheap so that was an ideal place to get the material for the project. Since her glasses are black and white, I chose black and white pieces of leather to complement them and I also bought one brown piece to have as a backup and also because I liked it. When I was there I also picked up some snaps for the closure of the case.
I’m really satisfied with how my first foray into leatherwork came out. Of course, it’s not perfect but it was fun to do and I ended up with some usable objects.
Boring stuff
I decided to start with the backup piece so I can try everything out before making it from the wanted leather and that ended up being a very good idea. I started with making the pattern on the piece of paper. And when I say making, I mean tracing a pattern I found online.

After making the pattern, I’ve cut it out of the leather and that was when it became obvious why it was good I decided to make this out of brown leather first. When I’ve cut the leather, I put the glasses into it and I’ve discovered that the pattern was not wide enough for these glasses. I should’ve tested the pattern with the paper before cutting it but what was done was done. Since I didn’t want this leather to go to waste, I decided to pivot and make it a little smaller in order to fit my harmonica (which I yet have to learn how to play) into it.

After that is the time to put the snaps in (at least the one on the part that’s folded over since it would be considerably harder to do so when the case is sewn). This is a part where I was really missing the proper tools for the job. I found some methods to use a hammer and a screwdriver but they don’t work that great so my closures didn’t come out too good. I ended up breaking three out of five snaps while trying to do this. Luckily, two were all I needed.
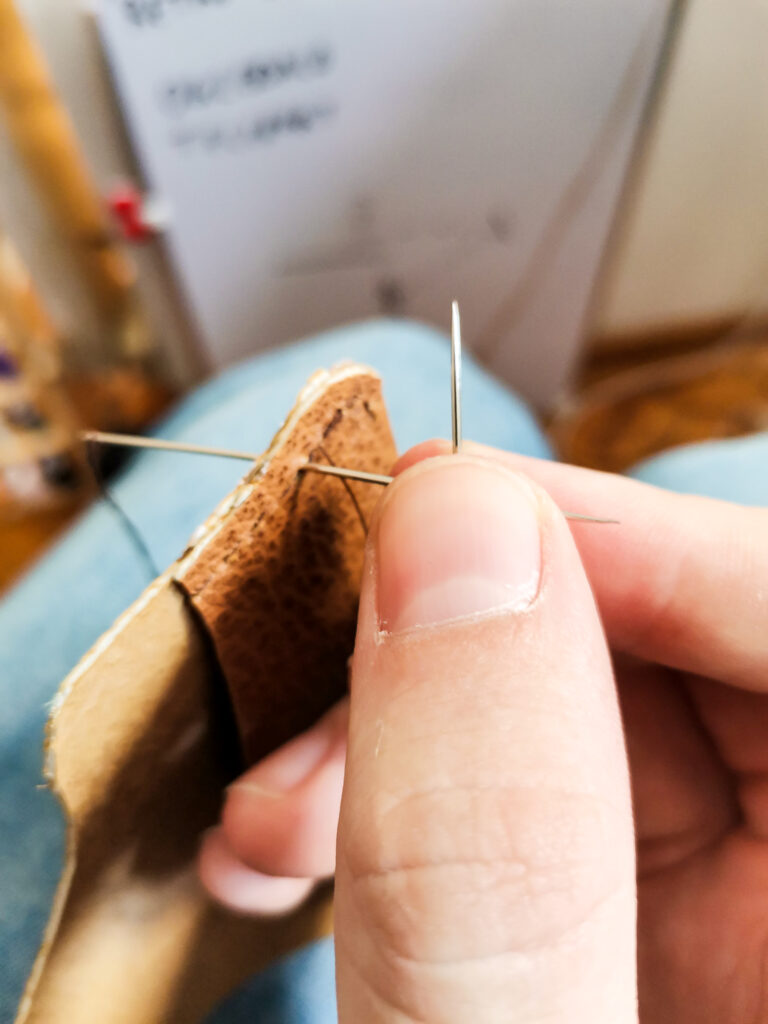
I glued the edges which need to be sewn together with some acrylic glue I had from the Make a keyboard project. Leather glue would work better but this seems fine so far. Then I punched the holes for the thread and then comes the fun part – the sewing. This is something I really enjoyed because there is a specific technique that is fun to do. It’s a nice feeling once you get into it and you get the moves in your muscle memory so the sewing just flows. Unfortunately, the nice thread I had was too thick for my needles so I had to use a regular sewing thread I had. It would’ve looked better with the thick thread and it would be more secure. This way, I did two passes with a thin thread, and it will surely hold the seams well but it won’t look as well as it could.
After sewing, you should burnish the edges of the leather but I didn’t have the tools for that so I skipped that step. Here I’ve shown photos for the brown case, but the black and white one was the same process except it was cut from two parts so there is also a seam in the bottom to connect the black and white pieces of leather.


