I really love Japanese crafts. They often are so complex but also simple in a way. Japanese craftsmen often dedicate their lives to studying a craft and often that becomes a family business which is then studied and improved upon for generations. The project that I did this week is relatively simple compared to some other crafts I’ve seen. But even with that in mind, if this was done by true bookbinding craftsmen it could’ve been so much better. There are some mistakes that are really visible here, but even if I did those things right when people dedicate their lives to their crafts, the level of detail in their work is unbelievable. The common thing I found in different Japanese crafts I’ve looked into is that they are often very meditative, they are not afraid of handwork, and it doesn’t matter if it will take 10 times more than with a machine if you can make it so it has a soul. And another thing is that they often incorporate beauty with function. You can bind books in a lot of different ways, but here you have all these different thread patterns which add so much to the end product.
I stumbled upon this technique a long time ago and I immediately wanted to make it but I hadn’t had a real reason for it until now (if you can call this a good reason). Working on this project, I had help from my girlfriend who already had previous experience with bookbinding and that was a tremendous help because I didn’t have to research all the small things, like which glue to use, where to find nice papers and stuff like that. But also, more importantly, she had some great tips which you don’t know until you try this, like how the paper reacts to glue, how much glue to use, the grain of the paper, and a lot more. She also had a bookbinding project on her own so it was nice to work together.
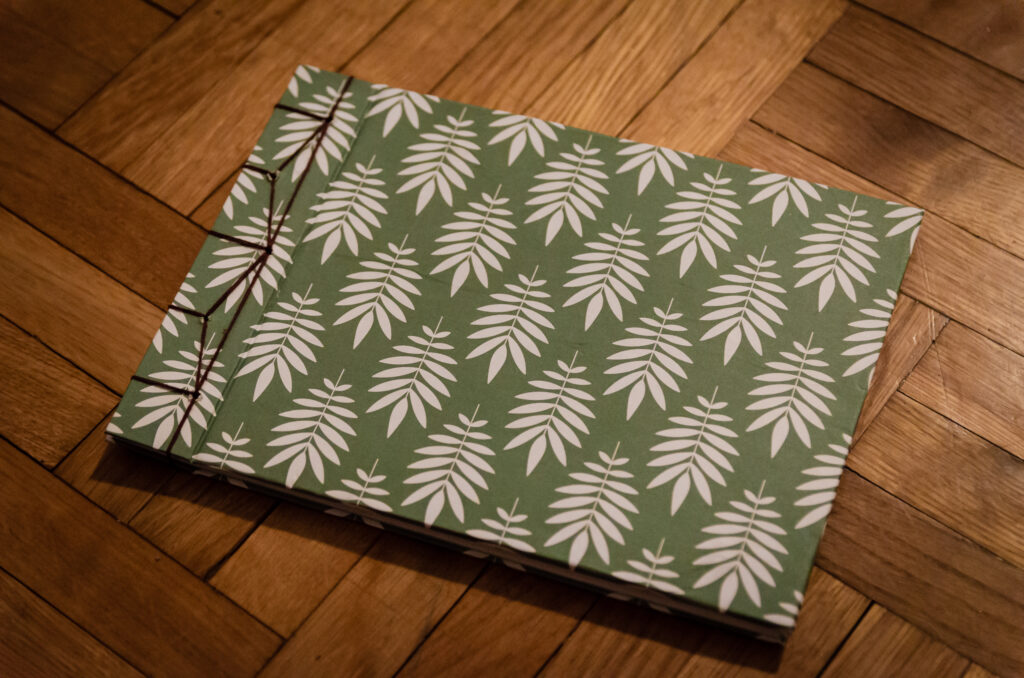
A really important information is that this notebook has 42 pages.
Boring stuff
The materials for this project are really simple and most of them I already had on hand. If you want to make this you’ll need some paper (of course); decorative paper for the book covers, optionally some for the inside of the cover too; mat board for the hardcover; paper glue; thread, and some basic tools – brush for the glue, a sharp blade, a drill or a hole punch and a needle.
I don’t have photos of the process itself but I mostly followed this tutorial and this timelapse. First, there was a lot of cutting. Since I had A4 papers and I wanted A5 notebook I cut the papers in half. Then I also prepared the mat board and decorative paper for the cover. There is a bit of math there because the covers should be a bit bigger than the paper and for this technique, you need to make them in two parts so the notebook can be opened. And the decorative paper needs to be bigger than the cover because it folds inside.
After preparing comes the gluing which is the most stressful part of this because the glue is a bit hard to spread properly without putting too much of it and to add to that it also dries kinda fast so you can’t take your time with it and the paper starts buckling from the moisture in the glue. With all that being said, it was a really satisfying process. Especially when you finally have the finished cover in your hands. Unfortunately, I managed to put the decorative paper upside down but it’s not that bad. And I tore the paper on the inside of one cover but I’ll find a way to hide it.
The next step is making the holes for the thread. There are two ways to do this, you can use the hole punch and punch the holes one paper at a time or you can put everything together, hold it together well (I did it with some cheap clips), and then drill it. The latter method ends up with uglier holes but it’s much faster and I had a drill I could borrow but didn’t have a hole punch. If I was trying to be as faithful to the original method as I could, I would’ve procured a Japanese screw punch and then punched all the holes manually. The method I chose also came with having not great precision which can be seen in the photos. Some holes aren’t aligned well and it’s the thing that bothers me the most about the finished product.
The last part is binding the book with the thread. I chose this pattern because it is simple and it looks good. If I do this again, I’ll definitely play around with other patterns. For this one, I followed the already mentioned tutorial but it was also really intuitive so you get a hang of it really fast. At first, I made it with only one thread but the thread I have is a bit thin so it wasn’t emphasized as I wanted so I did it again with the thread doubled up.


In conclusion, I really like the combination of the papers I chose, the thread, and this technique. This was mostly a simple and really enjoyable project and it’s something you don’t really expect. Who would’ve guessed you can make your own notebook.