The idea for this comes from my girlfriend. Since she just became an aunt a couple of days ago, she thought it’d be nice to gift a plushie to the baby. And of course, I immediately wanted to make it. I did think about making a plushie a long time ago, but they can be a bit complicated depending on what are you making. For example, if you want to make an animal, you really need to know what you’re doing because you need to transform a bunch of 2D shapes into a 3D object. And the other issue is if you want multiple colors. Because the plush fabric isn’t that cheap. You will usually need a small amount of fabric, but you never know if you’ll find a place that will sell it to you (unless if you know a place that sells small amounts). I had to buy 1m of fabric even though I needed only around 30cm. The same story is with stuffing. The smallest amount I could buy was 1kg which is way more than I needed.
Due to the aforementioned problems, we decided that a star plushie pillow would be a nice choice since it is a simple shape and it can be done in only one color. My girlfriend also embroidered the first letter of the baby’s name on it, for a more personal touch. That is something you definitely can’t buy in commercial stores. Also, you have an opportunity to choose the exact fabric you want. Making something on your own always gives you much more options to make precisely what you want.
Even though we chose an easy shape, this project was still very fun, and you get a really soft plushie at the end, which is always great. And considering I have a bunch of fabric and stuffing left, I’ll probably use them to make some decorative pillows for my couch.
Boring stuff
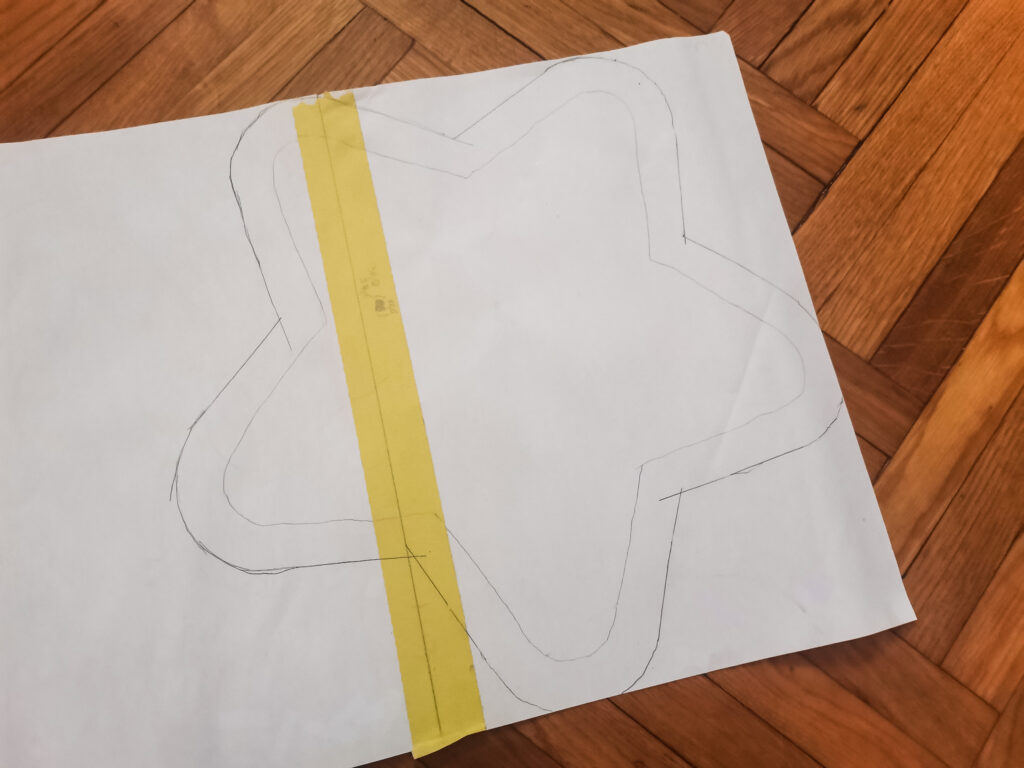
We begin by making or finding a pattern online. Since this is a very simple star, I searched for an image of a star that I liked and thought would look good as a plushie. Then I just copied it to paper. I also added 2cm of seam allowance, and as you’ll see in the next images, I later decided to soften those sharp corners a bit, and I’m happy with that decision.
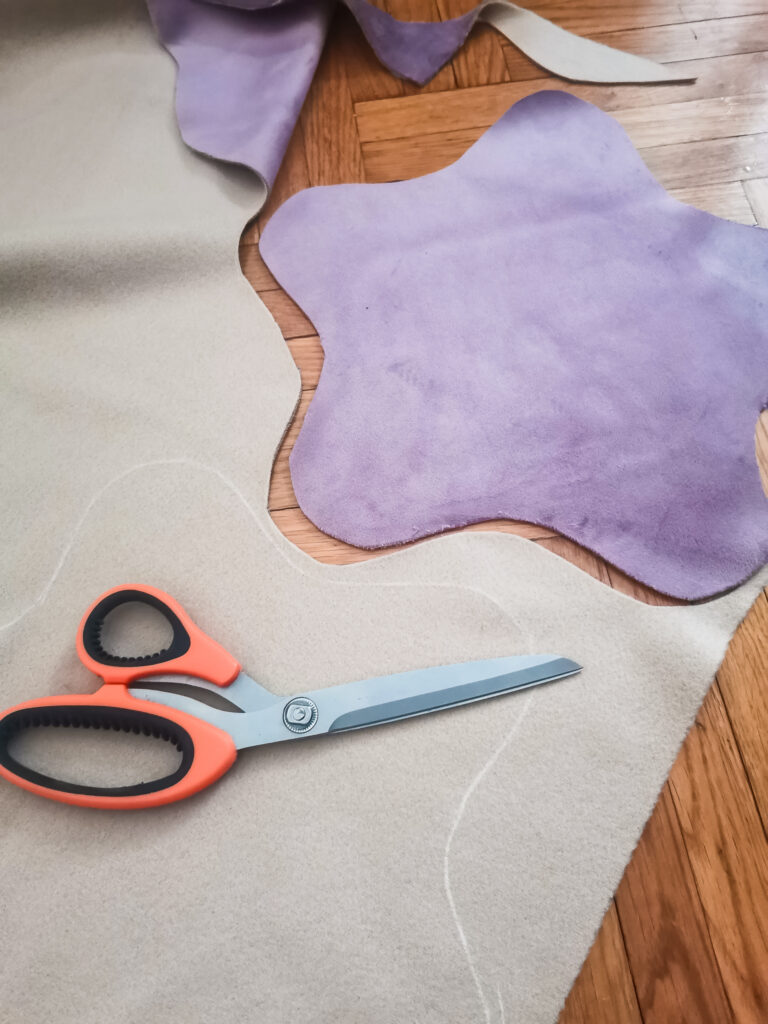
After cutting out the pattern, we can cut out the fabric too. I traced the shape with soap and then simply cut it with scissors (soap and chalk are classic tools for tracing patterns onto fabric since you can easily wipe them off the fabric). You can see the softer corners in this image.
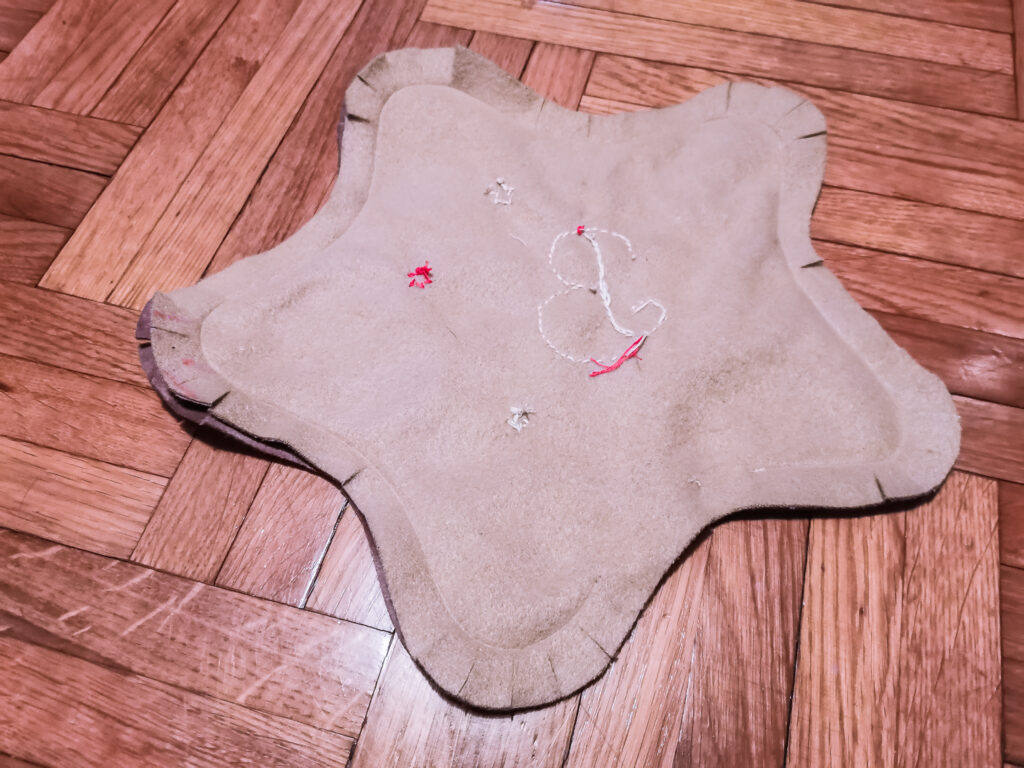
After cutting out the panels, I gave them to my girlfriend to embroider the letter and little star on them since this is the best time to do that. It’s much easier to do it then, than after they are sewn together. Then I sew the panels together, (right sides together) with the seam allowance that I planned. However, I didn’t sew it completely around the shape. I left a small hole, so I can turn it inside out and fill it with stuffing. I also made small cuts on the curved parts so they can more easily turn inside out. I should have also cut the excess of the seam allowance for the same reason. Leaving it at 2cm made it a little bulky and difficult to fill with stuffing in all the nooks and crannies.
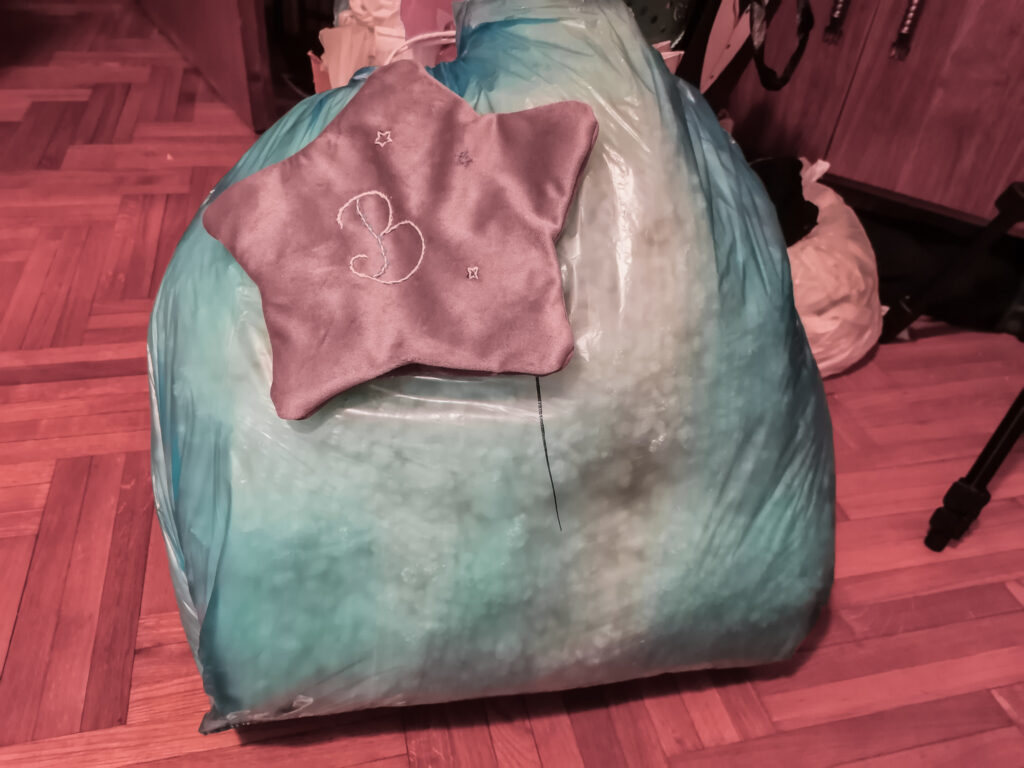
The last part is stuffing the plushie and closing the hole with a hand stitch. You can use the sewing machine, but it will not look good. You can see in the photo how much more stuffing I had than I needed. (I don’t know what happened with colors on this image, I took it on my phone so that explains it a bit)