I’m not sure where I’ve first seen this but it was probably on YouTube on some of the tech channels I follow, or in one of the various rabbit holes I’ve been through over the years. It caught my attention because it seemed like it’s not too hard to do but it had impressive results. All you need is the glass etching cream and a template of what you want to etch. The toughest part was finding the etching cream in Serbia and I remember looking for it without too much luck the previous time I was into this idea. But this time it wasn’t too hard. After a couple of tries with different terms there it was, and a couple of clicks and days later it was at my place.
The things I decided to etch are my online tag for social media, games and basically everything – “bin1101″ and a puppy. The reason behind the puppy is fun to me. It all started with a small 10″ netbook I bought for 30€ to play around with and I installed Puppy Linux on it. So I started calling that netbook puppy because it was small and had said Linux distro on it. I researched Puppy Linux distros more and found out that there are a lot more distros in that family with fun names and so I decided to name my tech products based on that list. The next one was my 17” big and heavy laptop which fittingly got the name FatDog (I’m not shaming him, that’s just his name). And my current PC got the name AttackPup because it’s a far more powerful machine than anything I’ve had before. So that’s the reason behind the puppy on the glass side panel. There is also a sticker of a puppy on it and I wrote its name with a silver marker inside the case. I would also like to have a couple of honorable mentions here: Puppy Studio, LighthousePup, LazyPuppy, Quirky… They are all loved.
I would recommend this to anyone who likes to tinker (or wants to mod their PC as I did) because it’s a really easy and fun project. And it’s also one of the easiest mods you can do on your PC to make it a lot more personalized. A word of caution though, be careful and follow the instructions, these are still chemicals that can etch the glass. You do get protective gloves in the package with the cream though.
Boring stuff
The first thing you need is a stencil. I prepared a couple of them in Photoshop and had them printed on sticker paper. You need to be careful when preparing your template. You need to follow all the stencil rules because afterward, you need to cut it out and stick it to the glass which can be tricky if you don’t prepare it well.
The next part was by far the most boring and I really wished I had a way to cut this with a machine. But it is what it is, so I’ve spent an hour cutting out the stencils. Don’t forget to clean the glass with alcohol before applying the sticker.
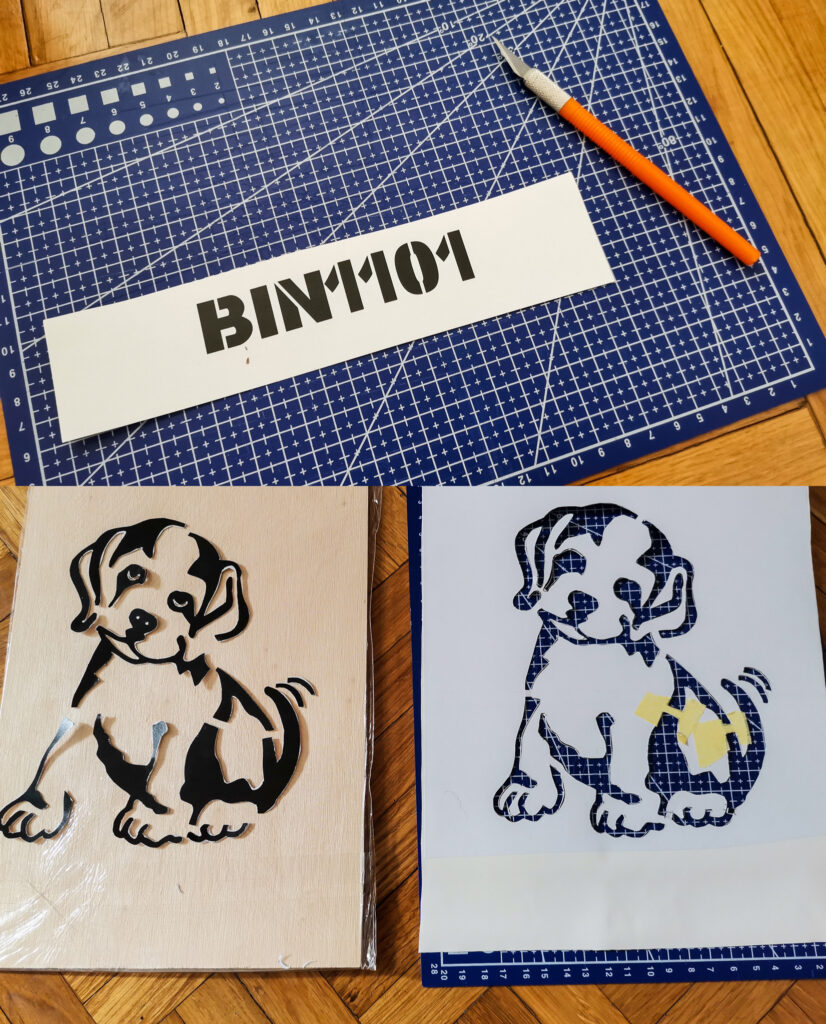
After that, you need to apply the etching cream. I did the smaller etch of my tag first so I can try out how everything works and that was a good decision since I’ve learned a couple of things there. The first was that I need to be more liberal with the amount of paste because there were some blemishes. And the second one was that I need better paper for the stencil. The one that the sticker was printed on was too ‘papery’ so it buckled from the moisture in the etching cream and got separated from the glass in some places so the paste got under it. I solved that problem by buying a vinyl sticker on which I stuck the printed sticker and then I’ve cut them both together and that solution worked.
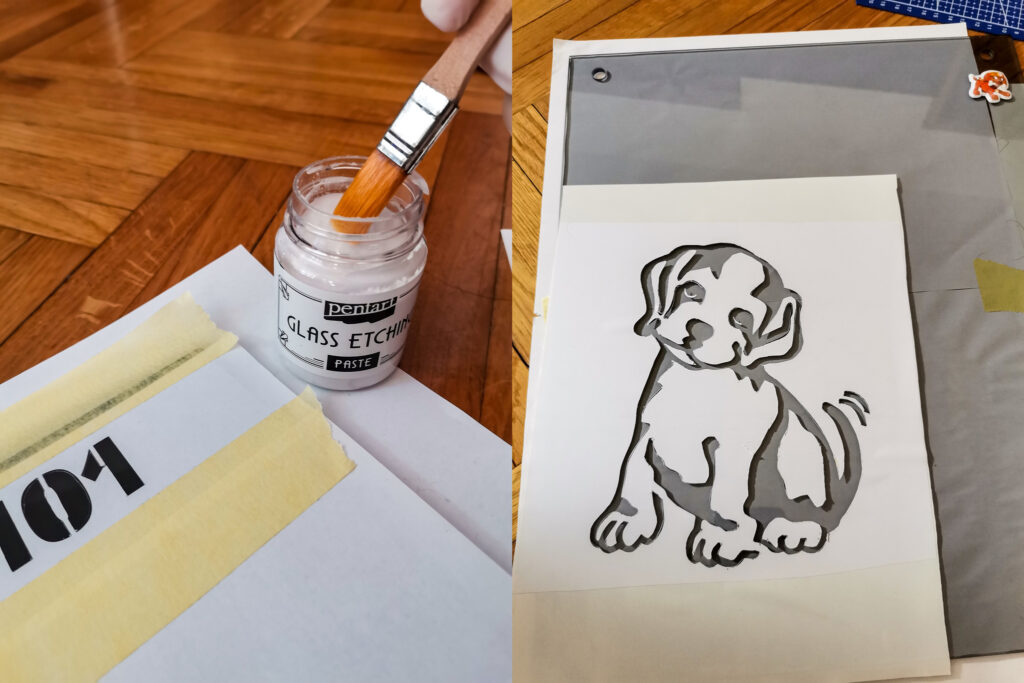
Then you need to apply the paste and as I’ve said, you need to be generous with it. At least with the kind I had. I used a brush to spread it out as evenly as I could, but even at the second attempt I didn’t get it perfect, but it was considerably better than the first one.

After that comes the hardest part, waiting to see how it’s going to come out. Thankfully it’s only 30 minutes. After the time has passed, you need to wash out the paste and it’s kinda hard to see the results while it’s wet but it’s a bit magical to see the result show up as it dries out. You know that it’s chemistry and science, but it’s still fun because you don’t know what exactly happened there (unless you do). At one moment you got some paste on it, and a couple of minutes later the structure of the glass is different.
Also, another hard thing to do is to take a good picture of it because it’s glass and it’s transparent and reflective, and just hard to photograph how it looks in real life. All in all, I’m really satisfied with the results of this project.


