Once again, the inspiration for this comes from my childhood. My best friend from elementary school had an Eifell tower made out of matchsticks. I always admired it. If you didn’t know it, you probably wouldn’t have guessed it was made out of matchsticks. The finish was really nice and clean. And when you are a small kid, it is even more grandiose because it is huge compared to you. If I remember the story correctly, his father had made it while he was in the army. I like that, it seems like a really cool way to use the spare time you have. And as I have noticed while making my little house, it is mostly very meditative.
It being meditative is true, but I must admit, it is really tedious. I made a miniature house from approximately 200 matches and even that took me several hours. There are a lot of operations you need to do, and you usually need to do them on every single match. So take every operation and then multiply it by 200. And some of them I did even more than that because I didn’t know how many matches I will need before I started making it.
Unfortunately, I was impatient, and to be honest, in a hurry, so I didn’t give the required attention to all the parts of the build. The result of that is that my tiny house doesn’t look nicely finished at all, and it is miles away from the finish of the Eifell tower that had inspired me to make it. One of the reasons for that is that this just requires more time than I had. You need to wait for the glue to dry a lot, and I haven’t waited enough most of the time. Also, removing the matchstick heads should be done carefully and precisely. But, when you don’t have time for that, you will just do it in any way that is quick (and probably ugly).
I guess that is the lesson for this post. If you want to do something well and have a nice finish, you need to dedicate time and attention to it. There are always shortcuts or tools that can help you do stuff faster, but in the end, when it comes to details, nothing beats attentiveness.
Boring stuff
I have bought 2 packages of matches, 10 boxes each. And in every box 42 matches. I did so because I had no idea what I actually want to make. Once I figured out what I want, I had to remove the heads of the matchsticks. And even though I knew approximately what I want to make, I didn’t have a detailed plan, so I didn’t know how many matches will I need. So I took one package and prepared 420 matches for the build. This is the first part where I was hasty. Ideally, I would find something that gives me a clean and precise cut. But the only thing I had that would do that was a flush cutter, but with that, I would have to cut them one by one and it would take me ages. So instead, I took a ruler and a box cutter. I lined up a whole box of matches, press the ruler against them, and then pass over them with a box cutter several times. This would cut off some of the heads, but it would leave a lot of them somewhere in half, so you would need to break them off with your hands. As I said, fast and ugly. This also gave me matches that are different lengths, so that was another problem to deal with later.
After that, I glued them in batches of five. This is another slow part because you need to pick up match by match apply glue to every single one of them and then press them together. In order to be faster, I was more sloppy, applying more glue than necessary because that way was quicker than carefully applying just the right amount of glue and then carefully lining up the next match and pressing them together. After making a bunch of groups of five, I combined some of them and made groups of 10 and 15 because I knew I would need them. I used a baking sheet as a working surface because the glue was going everywhere so I needed something to which the matchsticks wouldn’t stick.
Because the matches were all sorts of lengths, I had to clean them up and cut and sand them to a similar length.

It was only then that I have made a final design. I chose a simple house, with a door and a couple of windows. I based the measurements on the size of the segments I have made and proportions that would look fine.
Then, when I had a plan, I’ve assembled all the panels I needed. All the walls and the roof. For the doors and windows, I just cut the groups of five into smaller lengths and then flipped the window (door) horizontally. It’s worth noting that you should wait between each of these steps for the glue to dry. And as you can guess, I almost never waited enough.
And the final part, assembling all the big parts. This was by far the easiest part because you have only 8 parts and you need to glue them together. Although, because of all the shortcuts I took, this Is the part that had shown the most imperfections that were the result of them.
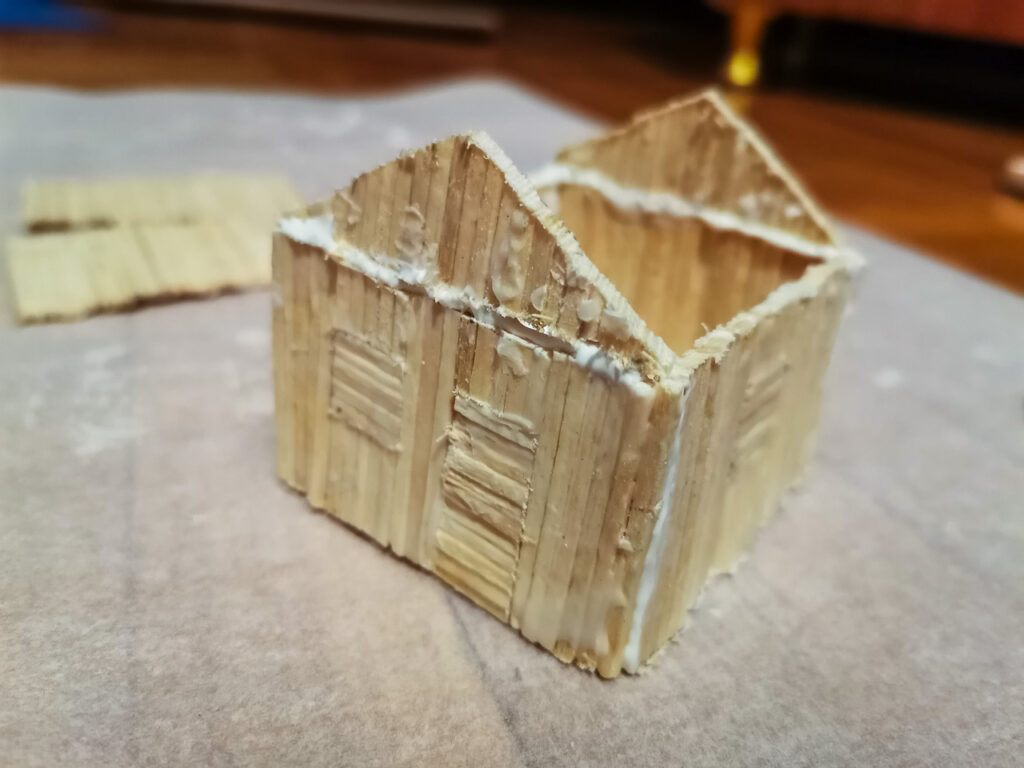
As you can see, glue is all over the place and the matches are often not aligned well. But, with a little more attention and time, you can have a much better result.