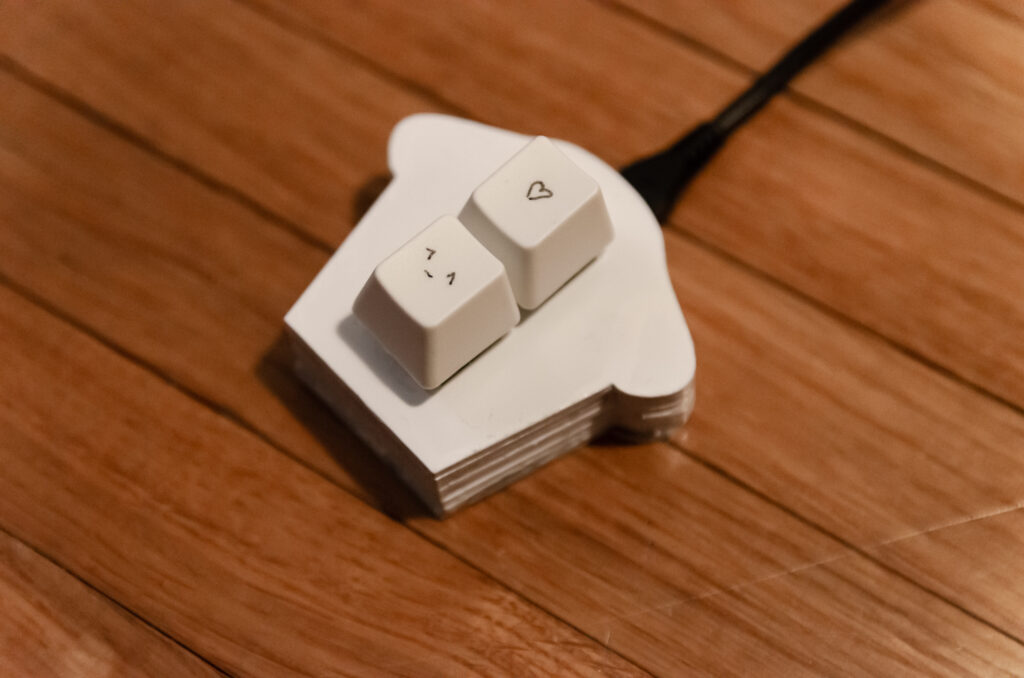
I present you the Muffin board. This is not the first keyboard I made, but the first one definitely took more than a week to make and it’s also not done yet so it couldn’t be a part of this project, When my friend and I were making our keyboards we, naturally, tried to convince everyone around us that they also need custom keyboards. My girlfriend, a bit jokingly said that the keyboard she would want would have only two keys, for her favorite two emojis. It didn’t take long for me to decide to make just that for her. I already had a lot of parts left over from my keyboard so the only thing I had to make specially for this was the case. When I was laser cutting the case for my keyboard I also designed the case for this and had it cut. And even though I’m not that happy with how the case turned out (especially the paint). It does its job and it’s not too bad if you don’t look at it too close. However, I do plan to revisit this and make a better version.
All in all, this is a not too hard project that I would recommend to everyone who likes to tinker. You can always adjust it to something useful to you. You can make a custom macro pad or num pad or even make a full keyboard. This is definitely a beginner-friendly way to get into this hobby.
Boring stuff
This keyboard is based on the 2% Milk keyboard which is a really fun keyboard on its own and I really like its name. 2% Milk has a PCB but since it’s only two keys it’s really easy to hand-wire too. You can also hand-wire full keyboards and I do want to do that someday too (mostly because it’s cheaper than ordering custom PCBs). For this keyboard, all I had to do was to solder 4 wires to the hot-swap sockets (which are pretty much necessary because of the way the case is made) for the key switches. One pin on the socket goes to the data pin on the Pro Micro and the other to the ground pin. And that’s it for soldering. I’m by no means good at soldering but I’m slowly practicing and I’m good enough to make stuff that will work (mostly). You could add a reset switch and an RGB diode but they are not necessary. You can reset the Pro Micro by shorting the reset pin with the ground pin.
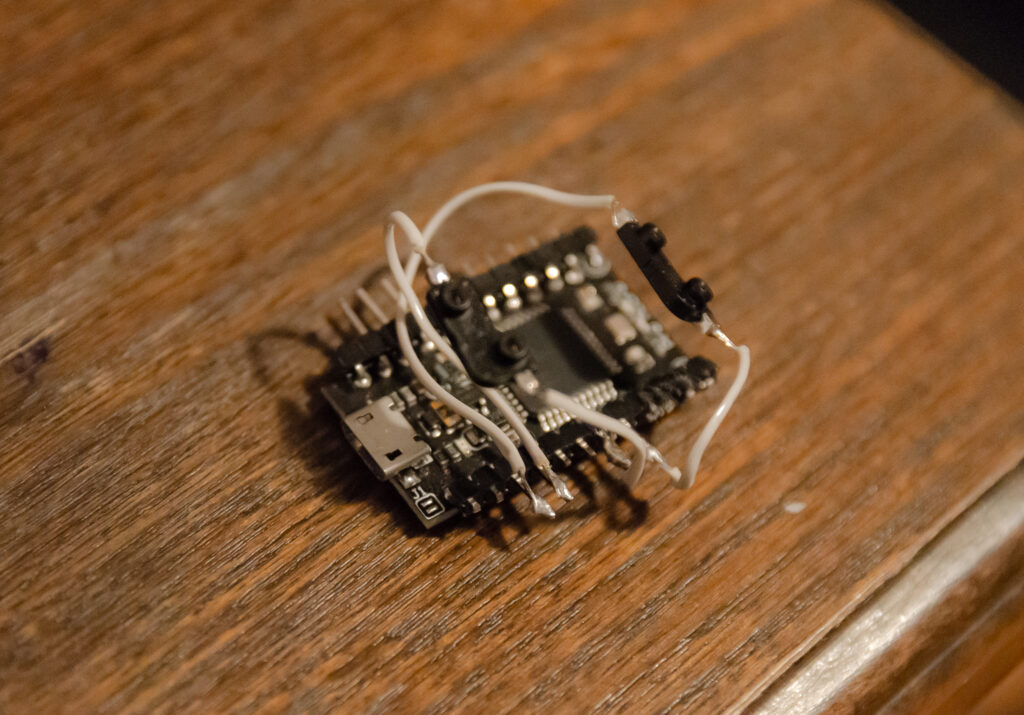
Pro Micro is the microcontroller that is the brain of this keyboard. It’s really popular in the custom keyboards community because it’s inexpensive and really good for keyboards. You program the Pro Micro using QMK which is a really fantastic open-source firmware for keyboards. It is crazy customizable and supports a huge number of keyboards. For this one, I didn’t have to write firmware from scratch because it’s based on 2% Milk, so I used the code for it and just changed it to fit my needs. QMK does support Unicode characters but that brings with itself further complications so I decided just to send simple strings of the characters that comprise the wanted emojis because I wanted it to work out of the box everywhere. QMK offers so much more functionality but because this already had its purpose I didn’t play around with any of that. So that results in a pretty simple code as you can see below. And a bonus for QMK is that it’s in C.
#include QMK_KEYBOARD_H
//define custom keycodes
enum custom_keycodes {
  KC_HEART,
  KC_JOY
};
//define the keymap
const uint16_t PROGMEM keymaps[][MATRIX_ROWS][MATRIX_COLS] = {
      [0] = LAYOUT(
          KC_HEART,
          KC_JOY
        )
};
//the logic that actually sends what I wanted to the PC
bool process_record_user(uint16_t keycode, keyrecord_t *record) {
    switch (keycode) {
      case KC_HEART:
        if (record->event.pressed) {
          SEND_STRING(“<3”);
        }
      return false;
      case KC_JOY:
        if (record->event.pressed) {
          SEND_STRING(“^_^“);
        }
        return false;
    }
    return true;
  }
All that was left after testing that all works were to assemble it. I glued the layers of the case together and painted them with white spray paint and that was the moment I discovered I’m not that good at painting. After that, I just put in the microcontroller and the switches and keycaps on top. As you can see, the keycaps are simple blank keycaps with emojis drawn on them with a marker. This is not a great solution because it will wear out in time so I plan to make better keycaps and you can expect that to be during this challenge too.