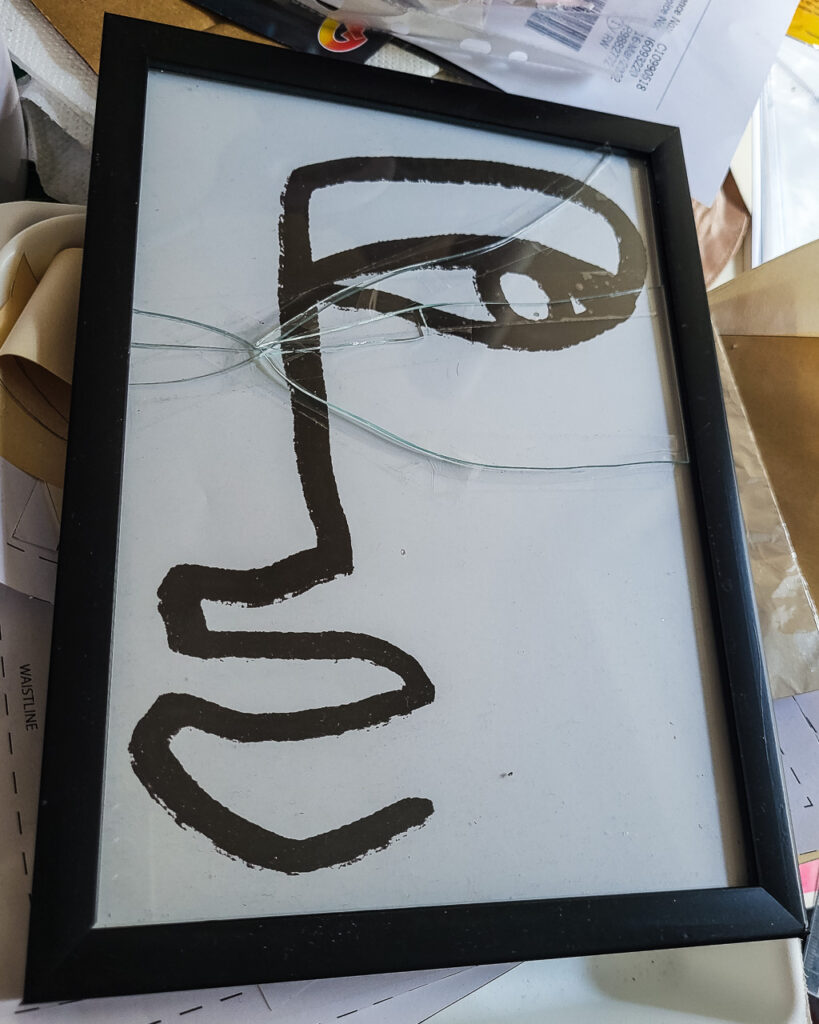
As you excitedly unpack your new picture frame, you’re hit with a disappointing discovery: the glass is broken. While it’s not a huge issue and the frame wasn’t particularly expensive, it’s still frustrating to have your plans shattered, no matter how small they may have been. 1
Usually, you would just throw away the frame, 2 because what else can you do? Well, this time, I had an idea.
This idea came as a marriage between two techniques: stained glass and kintsugi.
I considered if I should use the term “kintsugi” in the title, and I decided to do it even though not many people are likely to know what it means. I knew the concept behind the word and even then I couldn’t remember the specific word so I had to google it. Kintsugi is the Japanese art of putting broken pottery pieces back together with gold. The philosophy behind this practice is that by embracing flaws and imperfections, you can create an even stronger, more beautiful piece of art. This was very much my thinking while making this. This came about as an attempt to fix a broken glass frame, and just like in kintsugi, the lines where the glass is broken are not hidden but accentuated. 3
The other big influence I had is in the technique that borrows quite heavily from stained glass practices. So I would say that the result is a stained glass piece with the kintsugi philosophy.
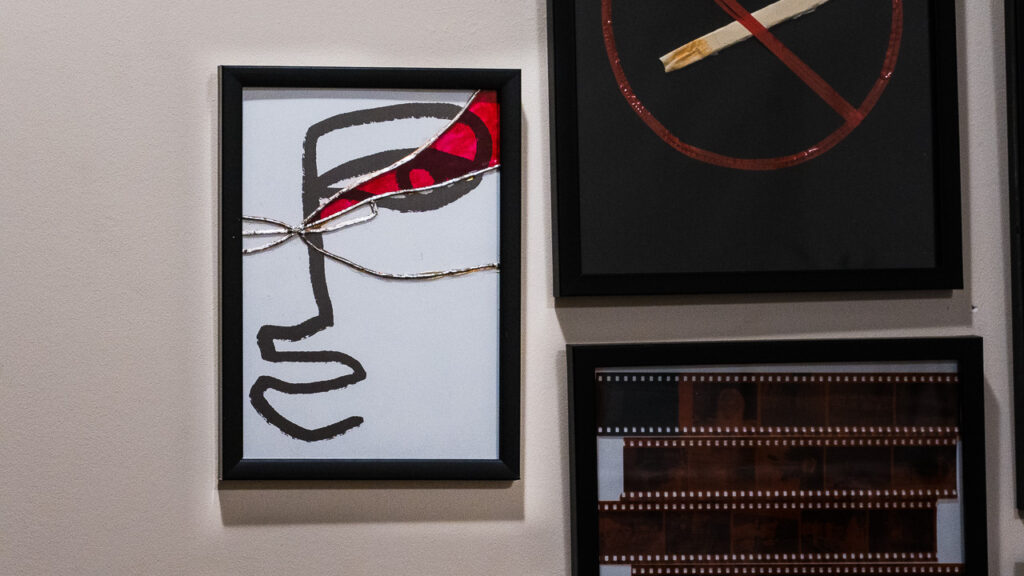
This is actually one of my favorite things I’ve made in a while. It is really simple but I think the result is amazing. And also, I do love the beauty that simplicity carries by itself. 4 Besides, it fits really well on the unconventional part of my gallery wall.
The idea
I am excited to share the evolution of this idea with you. When I first saw the frame, I was immediately drawn to the pattern formed by the broken pieces and the placeholder image that came with it. My initial instinct was to simply tape the pieces together to maintain their shape. However, this did not provide the best visibility of the lines and the tape looked unsightly when viewed up close.
From that, naturally came the idea to accentuate the lines where the glass is broken. Initially, I thought about using black paint to highlight the broken edges and then securing them together with superglue.
But then, fate intervened and a couple of opportune things just appeared in my mind. First, I remembered a video of Simone Giertz making a stained glass window. And second, I remembered how copper tape randomly appeared in my AliExpress feed a couple of weeks ago. 5 I even considered buying it just in case.6 Well, I didn’t buy it then and there, but those two things made me realize there is another way to do what I wanted. Why not make a “stained glass” version of this frame? From the video, I remembered that stained glass is kinda simple to make. The only really specific thing I was missing was the copper tape. 7
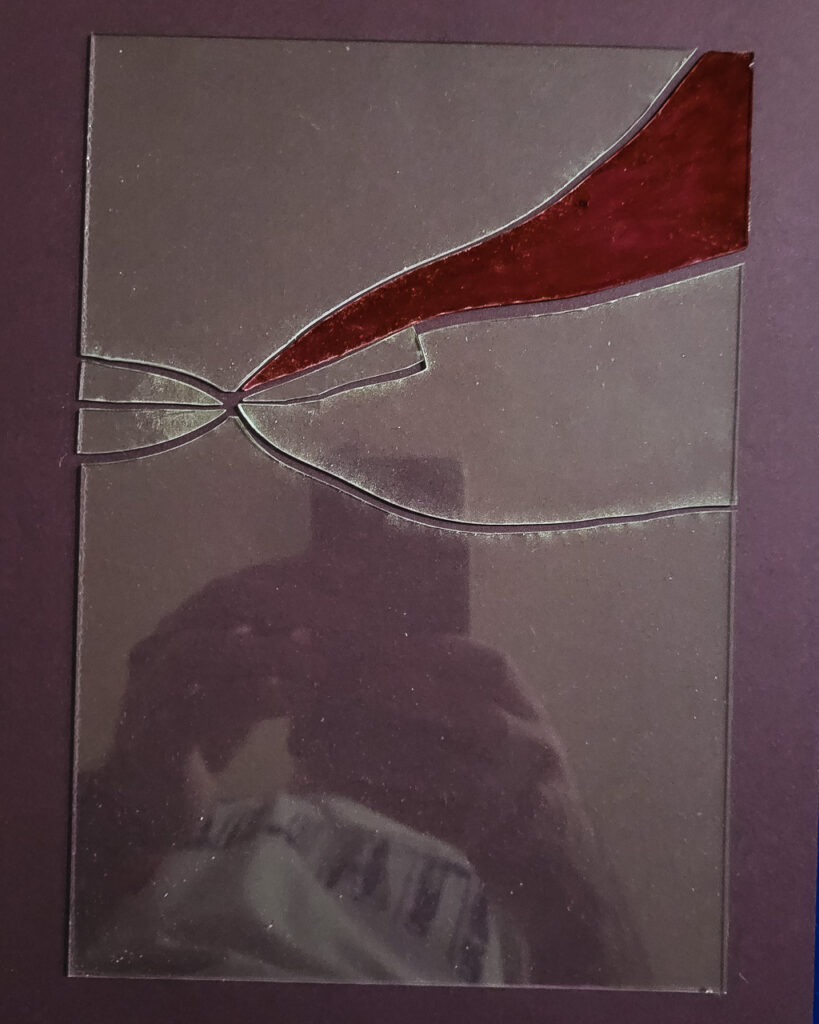
And the final touch came from my girlfriend who remembered she had some glass paints she borrowed from a friend and suggested I could use them for this project. I looked at the pattern and I knew what was the only option. Just one piece in red. Everything else – transparent. And there was a perfect piece that was going over the eye which would look amazing in red.
As you can see, there are clear 4 steps that lead to the final idea. I really enjoy this part of the project because I can rarely see the individual steps that lead to the final idea so clearly. Of course, ideas evolve and morph and merge, but it usually just happens unconsciously, or it happens over a long period of time so the process is less noticeable.
The boring stuff
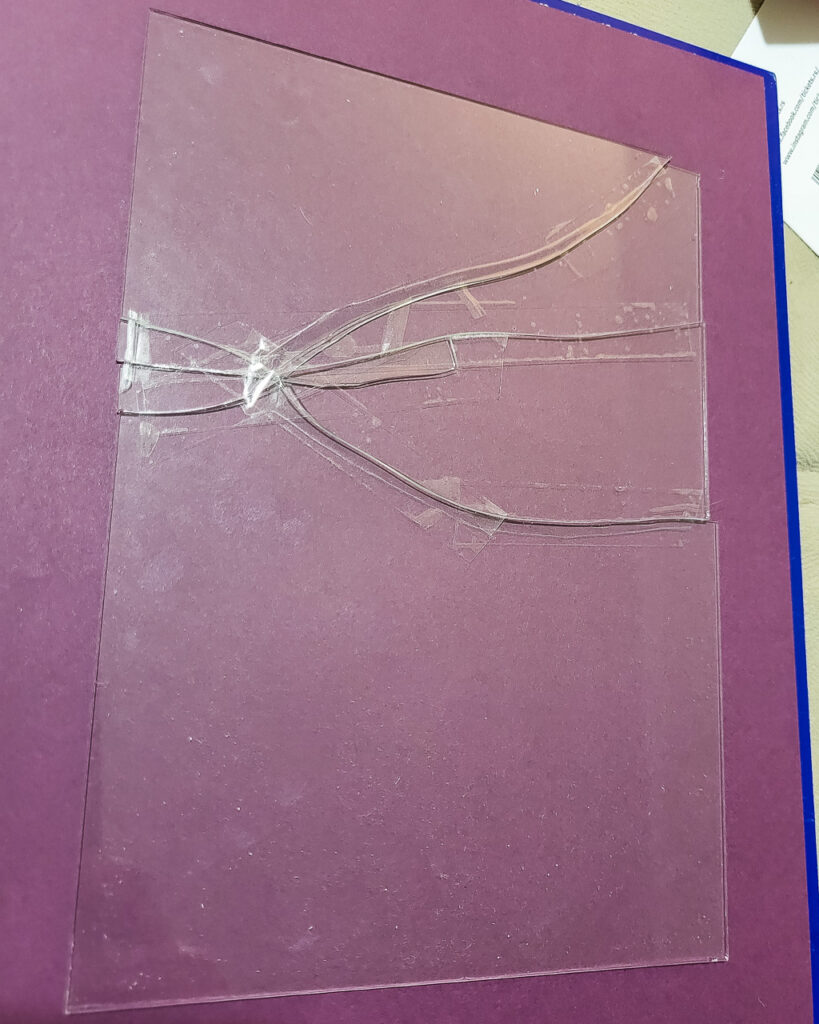
The tape didn’t work out, but it did help to keep all the pieces together until I had everything I needed to make my idea come to life.
The first step was to paint the piece I wanted red and to sand all the edges where the tape will come. 8 The paint ended up not very even. There are clear splotches and brush strokes, and even one paint chip that got there accidentally while I was closing the paint bottle precariously over the freshly painted piece of glass. But, while I was painting it, I realized that not only that I didn’t mind it, I even preferred it that way. It worked great with the “imperfections” theme I had going here.
I used some 400 grit sandpaper I had lying around. I’ll be honest, I didn’t research this thoroughly so I’m not sure if I did this step well and if there is some more important point other than making sure there aren’t any sharp edges so you don’t cut yourself, or the copper tape when you apply it.
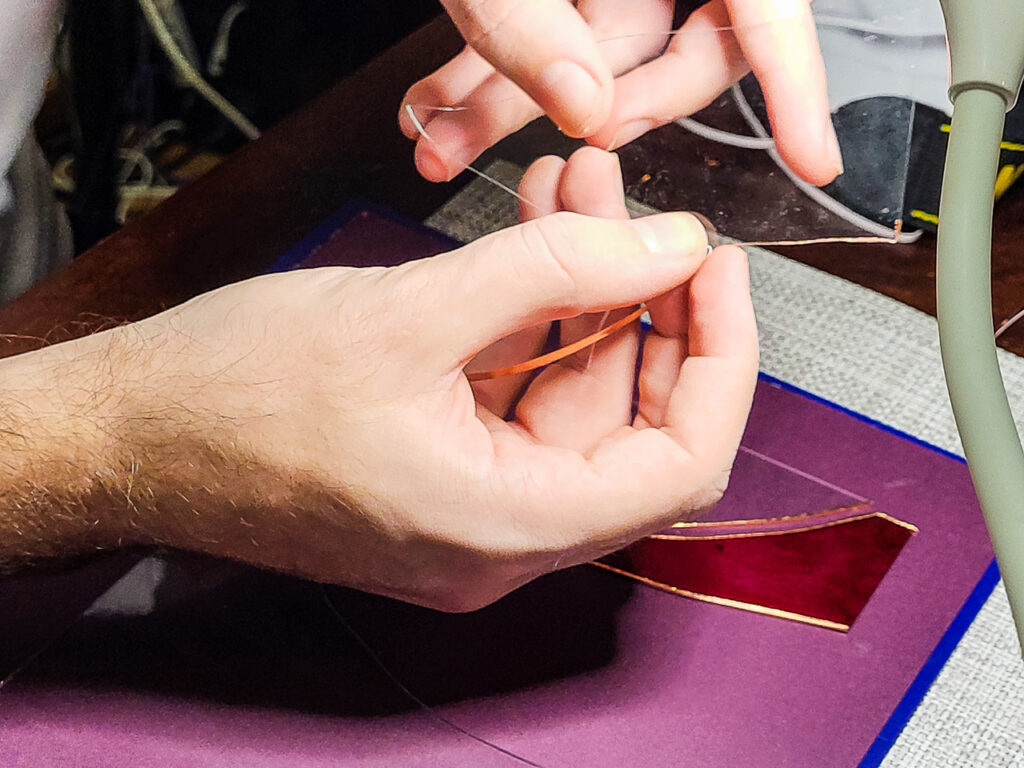
Anyway, after sanding, I couldn’t forget to clean the glass even if I wanted to. There were speckles of glass dust everywhere and the copper tape definitely wouldn’t stick well if I left it like that – that much I do know. The next part was the most meditative. It was a bit tricky because you’re trying to stick a 3mm wide tape to the edge of a 1mm thick glass, and leave equal width of the tape over each side. But, once you get into the groove, it is quite pleasant to do. And as a bonus, it is the first time you see how cool the glass pieces look with the edges taped up.
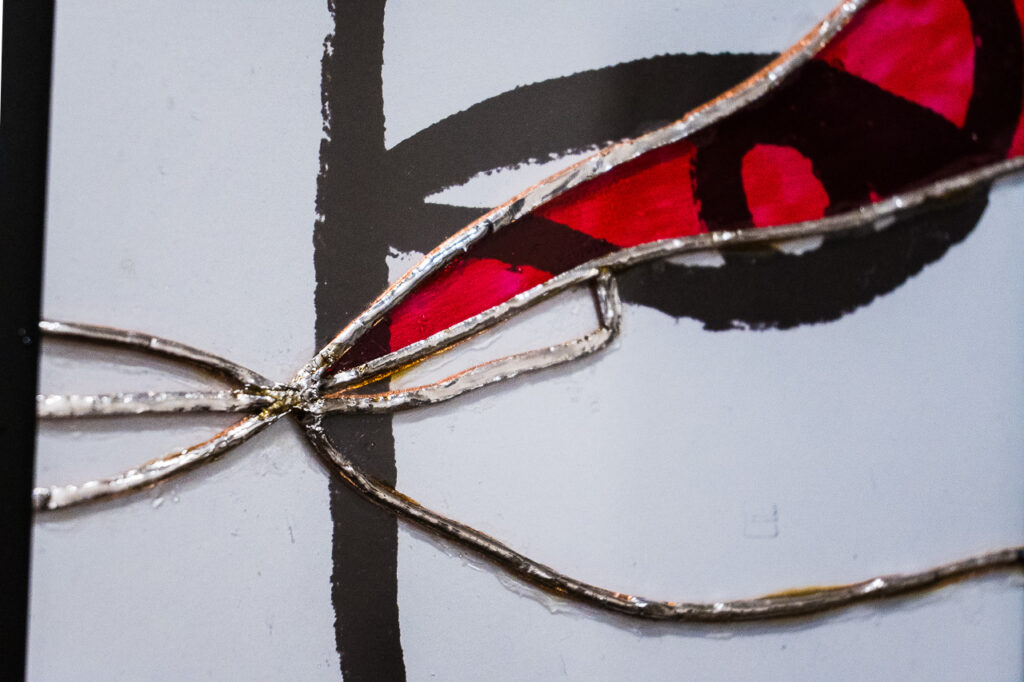
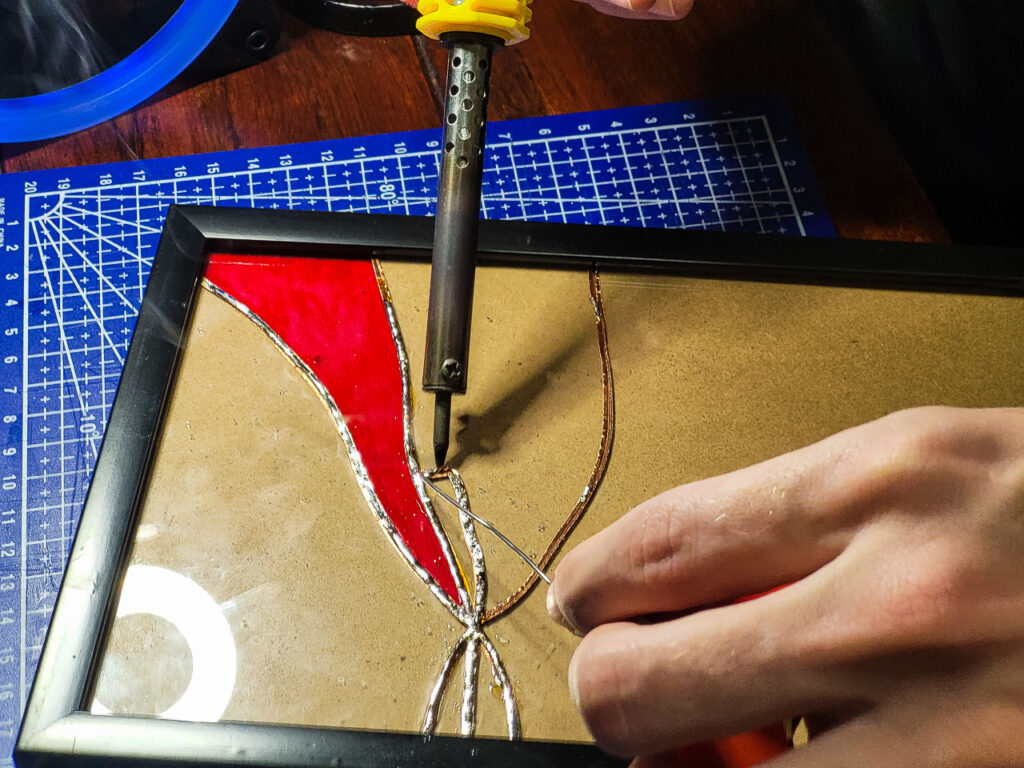
The last part is the most stressful one: soldering the pieces together. This is something I never thought about, but it makes perfect sense. How else would you make stained glass? Would you make a metal frame and then fit the pieces of glass in it? Maybe, I don’t know the history of stained glass. But the point is that this method is surprisingly easy.
Copper is a great material with many interesting properties. A very frequent practice is to solder copper wires to bind them together; well, this can also work on copper tape. Since we have all these pieces that fit perfectly together and they are all edge-banded with copper tape, why wouldn’t we solder them together? By doing that, we get a really strong bond and all those broken pieces become one strong piece.
The reason why this was stressful is probably that I wasn’t doing something right. There were drops of solder jumping around and sticking to the glass. There was some weird yellow liquidy thing that showed up on solder joints. I couldn’t really keep the flow equal so they aren’t really pretty. And this is a part where imperfections in the taping show up because if the tape is wider on the bottom side than on the upper, you will see it behind the solder and it doesn’t look the prettiest. But, in the end, all of this doesn’t really matter. Remember the imperfections philosophy thingy? In my opinion, all of this just adds to the final piece.
The last part was the most exciting one. Putting the image back in the frame and seeing the final result. I am beyond thrilled with how it worked out. The only thing I would probably change is to turn the whole glass around because the other side is still just copper tape and I prefer how it looks. At least in this case. But that would mess up the alignment of the red piece and the eye. I might flip the image too and then flip the glass, but that will be left for another day. For now, I’m satisfied with this project either way.
I’m surprised by how much I had to say about a seemingly simple idea and project. Maybe that’s a part of the beauty that comes from simplicity – there is always something bigger behind it.
Thank you for coming along with me on this adventure, and see you in the next one! 9
Fun fact: this paragraph was written with help from OpenAI’s new ChatGPT tool. I wasn’t satisfied with how my sentences sounded so I asked ChatGPT to help me rewrite them.↩
or at least the glass↩
Well, unlike kintsugi where you do this with gold, I did it with copper tape and solder for obvious reasons.↩
This will probably be the subject of a future blog post↩
Yes, sometimes I just browse AliExpress, don’t judge me.↩
I don’t know what the case would be, I didn’t even know what it is used for. I just thought it looked like it can be potentially useful.↩
Well, if you want to cut your own shapes there are more tools, but I was just using the glass that was already broken into perfect shape.↩
Well, the first step should’ve been to clean the glass. The paint job would’ve been nicer… …maybe, I’m not a great painter anyway.↩
Well not really see because this is a written medium, but you know what I mean↩