Hey there reader, long time no see. Well, if you want to be technical about it I don’t see you while you’re reading this, but you get what I mean. I’ll be honest, I’m writing a blog post about coasters just as a way to get back in the game. The truth is that in previous months I’ve started writing posts on a couple of topics but I was struggling to finish them. It’s been too long since I’ve written one of these so I’m a bit out of practice.
So, coasters, not a very exciting subject, but I needed some, and I thought of an idea how to make a cool version of them so here we are. As it often happens, this story started with a YouTube video that caught my interest. Already in the thumbnail, you can see how cool plywood patterns can look so naturally I wanted to make some for myself. My original idea was to make a box with the top made out of patterned plywood. This project is still in progress, but in order to make that, I made way too many pieces for the pattern. There is the material, and now – the inspiration.
I won’t lie, the inspiration is completely practical. I like to have a glass of water at my desk at work, but we don’t have coasters in the office. As you can guess, cold water in the glass leads to water rings on the desk surface. This isn’t a problem in itself since the surface doesn’t seem to get any visible traces from the water. I just find it annoying when I have drops of water on my working surface. And like a true maker, instead of just going to a dollar store and buying some cheap coasters or just using something random I could find around, I decided to make some for myself. It didn’t take long to connect the material I had on hand with this little project since I thought the geometric patterns you get would look really nice in a coaster shape.
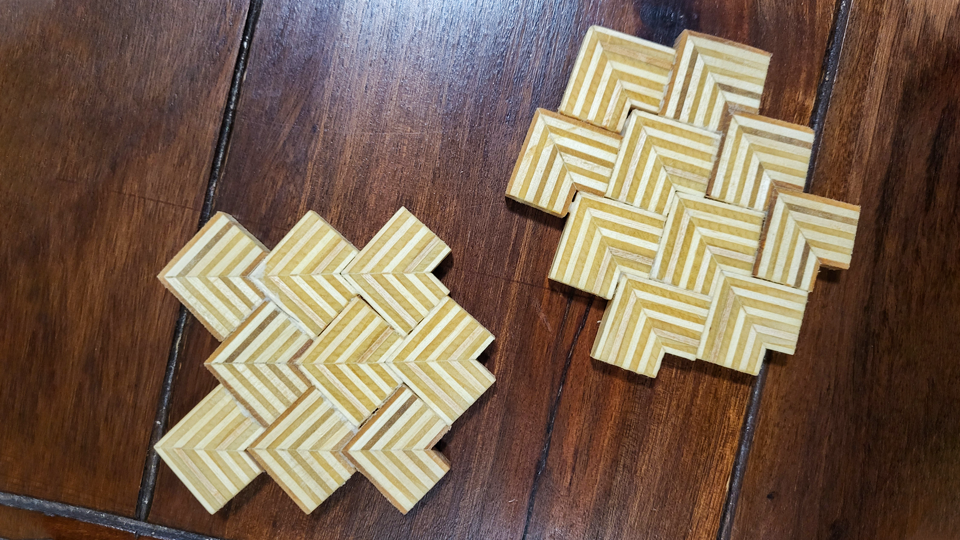
At this point I already had all the pieces cut and prepared so all that was left was just gluing them up, sanding the surfaces, and applying finishing oil. I must say that I’m pretty satisfied with the result, although they are not as precise as I wish they were. I’ll be a poor craftsman and blame the equipment for that 😀 Of course, the truth is that I could’ve made it more precise even with lacking equipment but that would require a lot more time and patience.
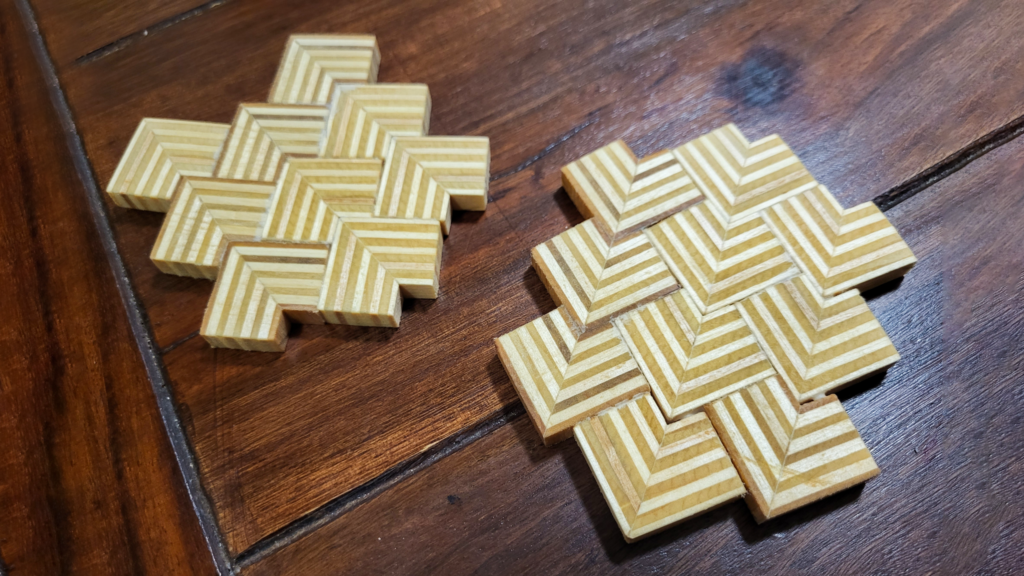
The most important part is that they serve their purpose and they look cool, although a little imperfect. I think this could also be a nice product for selling. It involves a lot of steps and not an insignificant amount of time but all in all it is not too difficult to produce.
The boring stuff
If you want detailed instructions, I would recommend the video I mentioned at the beginning. However, I will give you a quick run-through if you want to see what is involved in the making process without having to watch a whole video.
First, you need to cut a bunch of long pieces with one edge cut at a 45-degree angle. This is the first part where I wasn’t the most precise. Ideally, you would do this on a table saw, but what we (a friend and I worked on this together) had at our disposal were a band saw and a miter saw which can be tricky to dial up precisely if you are an inexperienced woodworker as we are.
Then, pair those pieces up and glue them on the angled side.
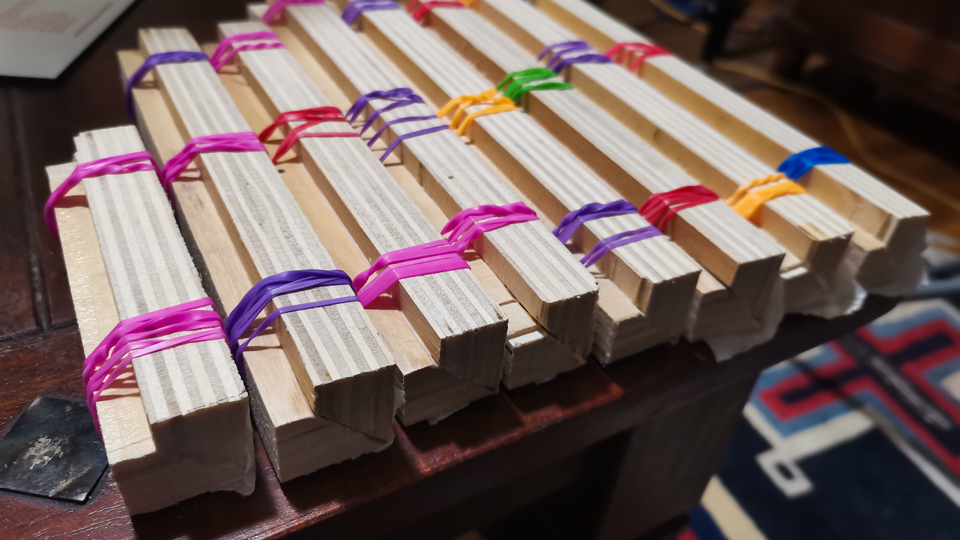
After the glue dries comes a lot of cutting. And I mean a lot. We sliced these segments into 6mm thick pieces. And then we sanded the edges on every single one of those pieces.
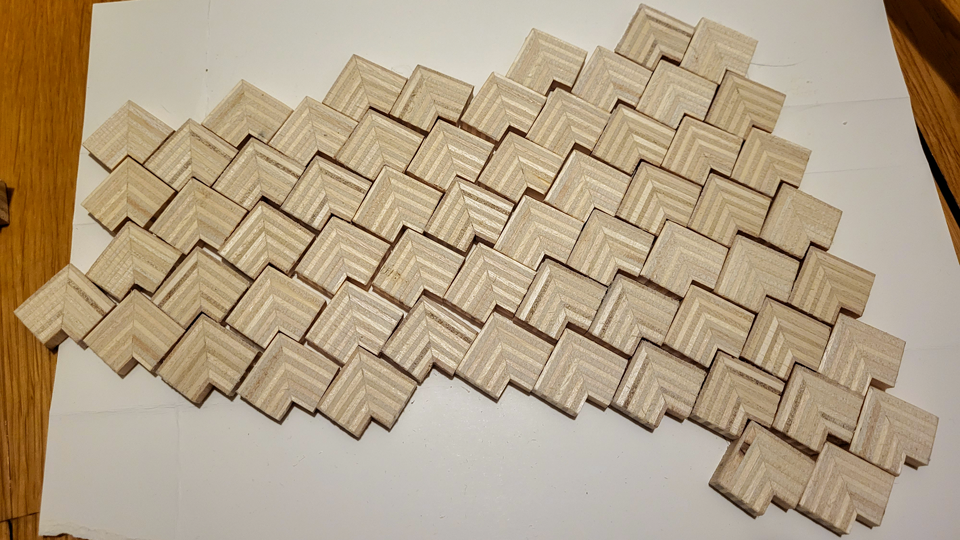
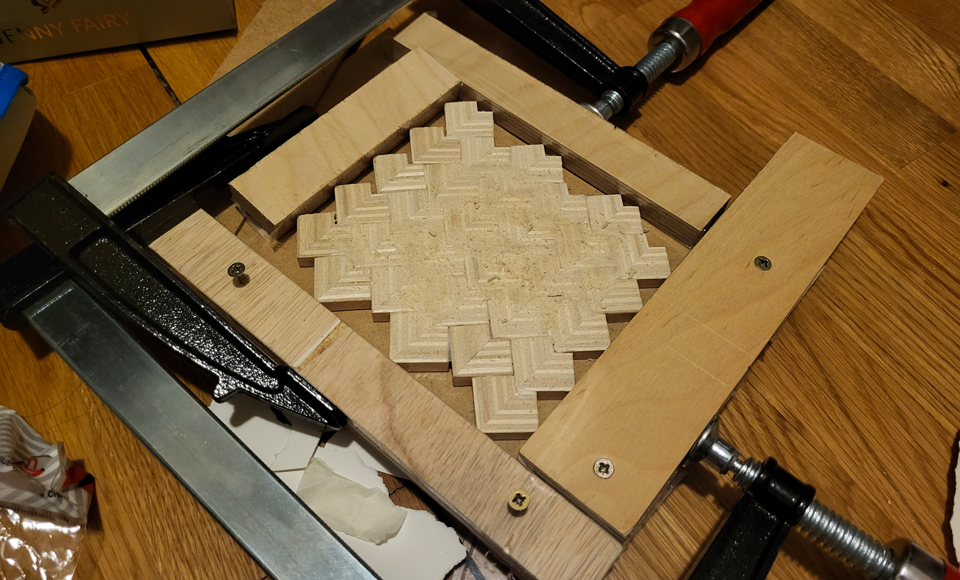
And then comes the step where all the inaccuracies sum up and become obvious. Gluing up the final shape. You start the first column and everything seems fine. But already in the second column, some things won’t fit perfectly. And by the end, you have huge gaps. I tried to fill the gaps with wood glue and sawdust but that didn’t end up looking great because I wasn’t patient enough to sand it properly. Here is the picture of the glue up for the box top since I forgot to take a photo of the coasters in this phase. You can see the huge gaps on the upper left side of the image.
When the glue dries all that is left is finishing. Sanding and applying finishing oil. I used linen seed oil because that’s what I had on hand from the knife block project. I couldn’t decide what exact shape I wanted so I made two versions. In the end, I liked the right one better. Since the sawdust and wood glue technique didn’t end up looking that well I chose the other side to be on top so it looks cleaner but you can see the gaps.